Deploy a Kubernetes Application
Last Modified: 11/18/2021
This guide will show you how to create and deploy an app onto the EdgeXR platform using a Kubernetes (k8s) application. This guide will utilize an example Docker Image previously shown in the Create and Upload Your First Docker Image to EdgeXR page as we go step by step. If you have your own Kubernetes application, you can manually enter the relevant information throughout this tutorial.
Before continuing, make sure you have read about applications and learned how to create an app using the EdgeXR platform here.
Creating Apps
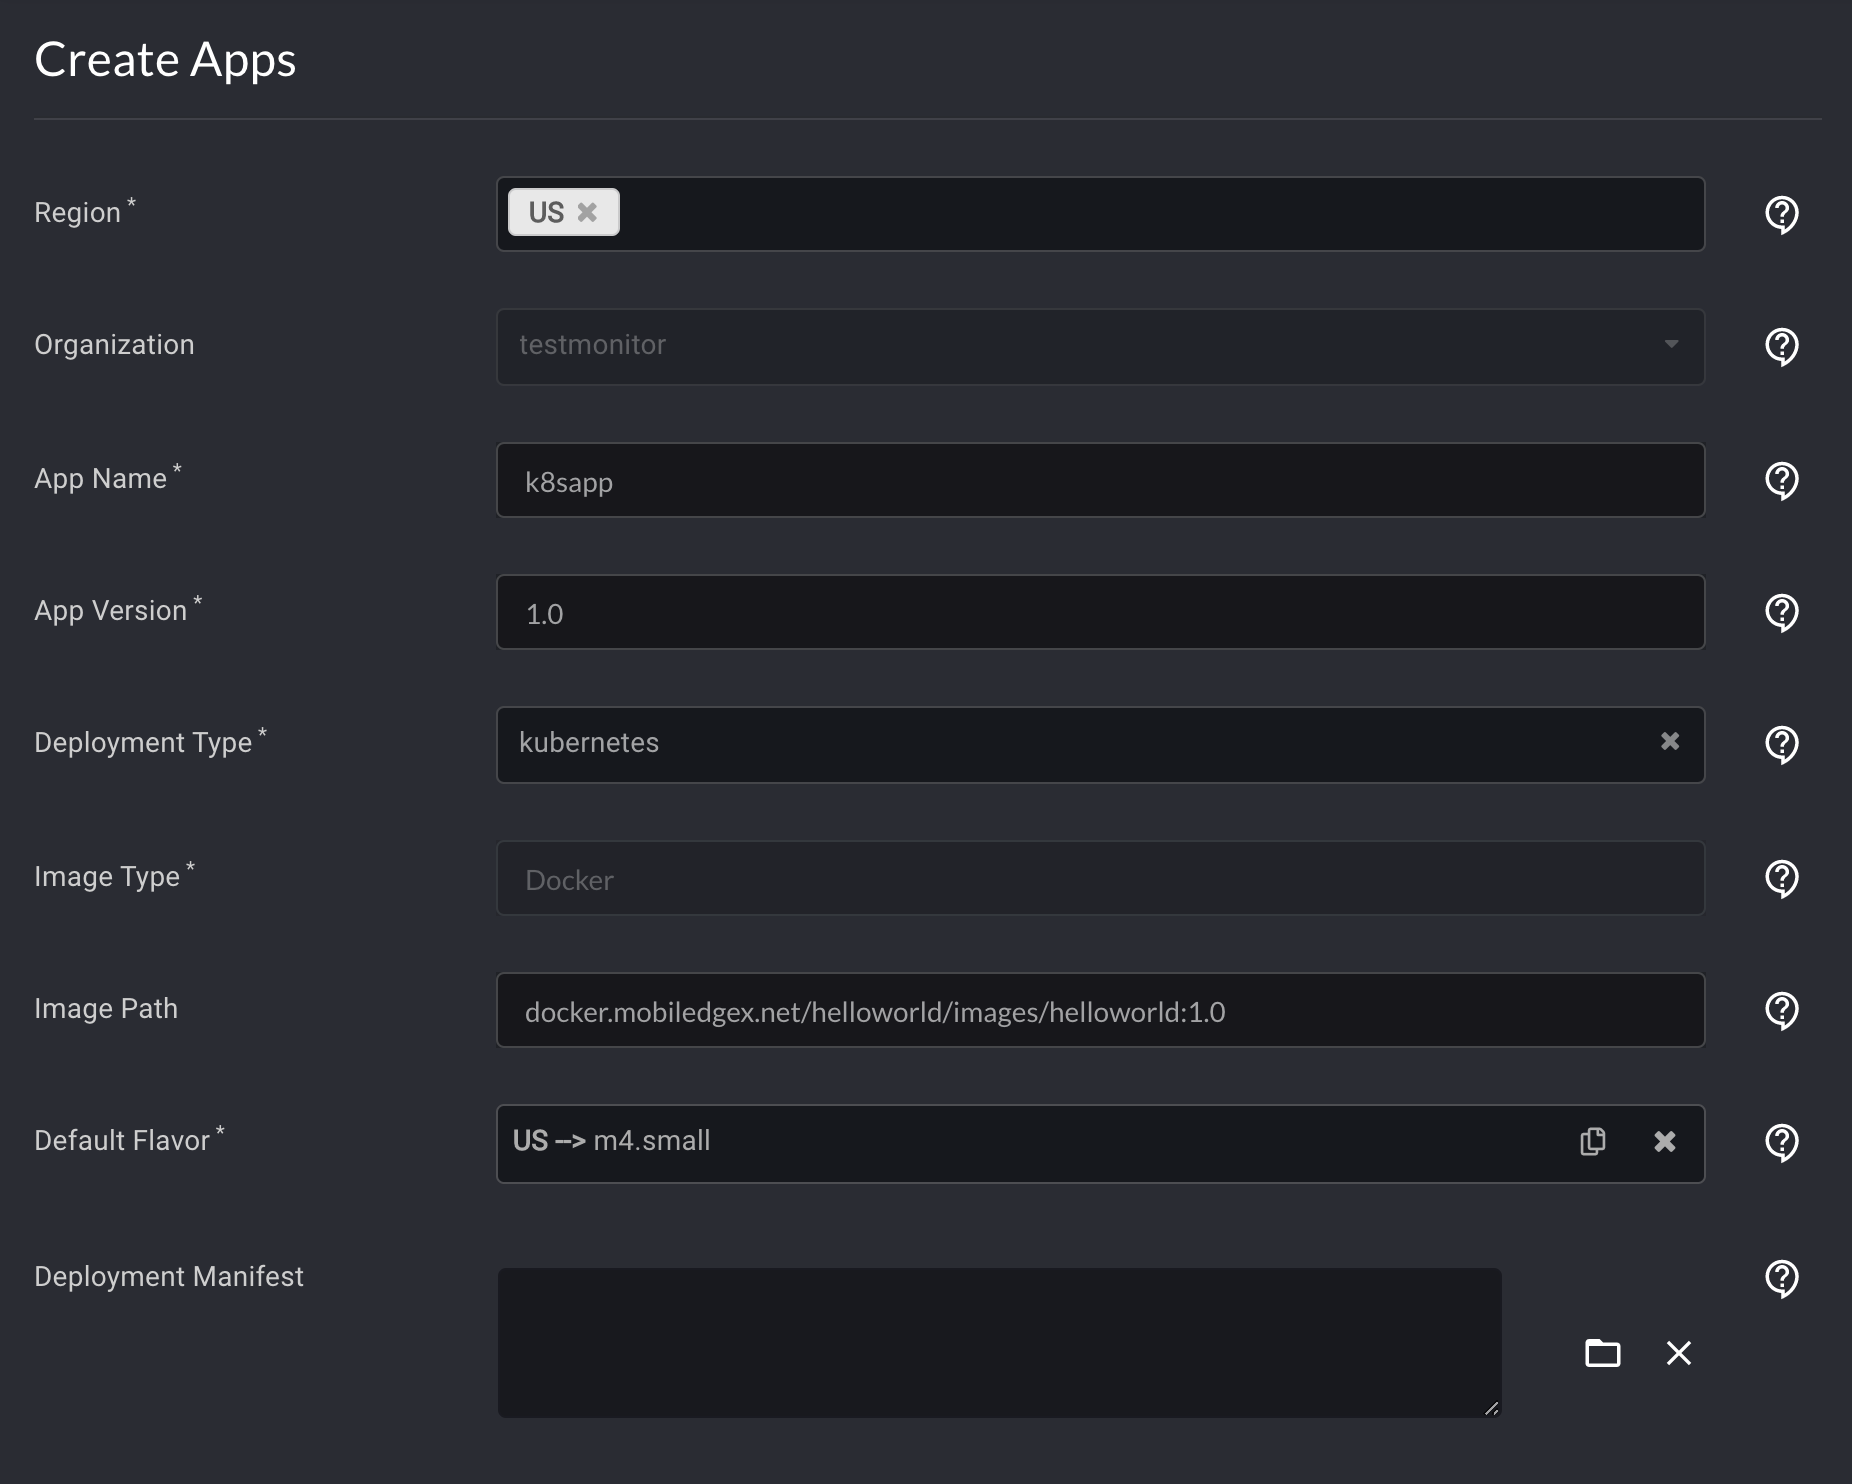
In the EdgeXR Edge-Cloud Console left navigation, select Apps. Then, in the top right corner, select the plus sign icon. This will take you to the Create Apps page.

In the Deployment Type box, enter kubernetes.
In the Deployment Manifest box, you can optionally include your k8s.yaml file through several ways:
You can add the content of your
k8s.yamlfile directly in the text box.You can specify the URL to the path of your
k8s.yamlfile in the text box.You can locate your
k8s.yamlfile locally by selecting the Folder icon, which will open your File Explorer or Finder, then uploading your k8s file.
If you choose to use a Docker image to deploy a Kubernetes Manifest, you can:
Specify the image path without an input argument to the Deployment Manifest. A Manifest will be generated for you.
Manually provide a Deployment Manifest argument which includes the image path referenced within the Manifest itself.
It's important to remember to specify the Service section within the k8s.yaml file. Otherwise, your deployment will not succeed. The following is an example of a deployment manifest.
apiVersion: v1
kind: Service
metadata:
  name: nginx-service
  labels:
      run: nginx
spec:
  type: LoadBalancer
  ports:
  - port: 80
    targetPort: 80
    protocol: TCP
    name: tcp80
  selector:
    run: nginx
---
apiVersion: apps/v1 # for versions before 1.9.0 use apps/v1beta2
kind: Deployment
metadata:
  name: nginx-deployment
spec:
  selector:
    matchLabels:
      app: nginx
  replicas: 1 # tells deployment to run 1 pods matching the template
  template:
    metadata:
      labels:
        app: nginx
    spec:
      containers:
      - name: nginx
        image: nginx:1.14.2
        ports:
        - containerPort: 80
          protocol: TCP
The default deployment manifest created for the user contains 2 types of resources: Service and Deployment. The Service defines an external LoadBalancer. The LoadBalancer resource provides an externally-accessible IP address that sends traffic to the correct port on your cluster nodes. The Deployment defines how the application is to be deployed. It will define the docker image to run and the internal ports the app will use. It will also define the app to run with replicas=1 which will only create 1 pod for the app.
You cannot use a .zip file with Kubernetes to deploy your application.
For the other boxes, you should enter the relevant information for your app.
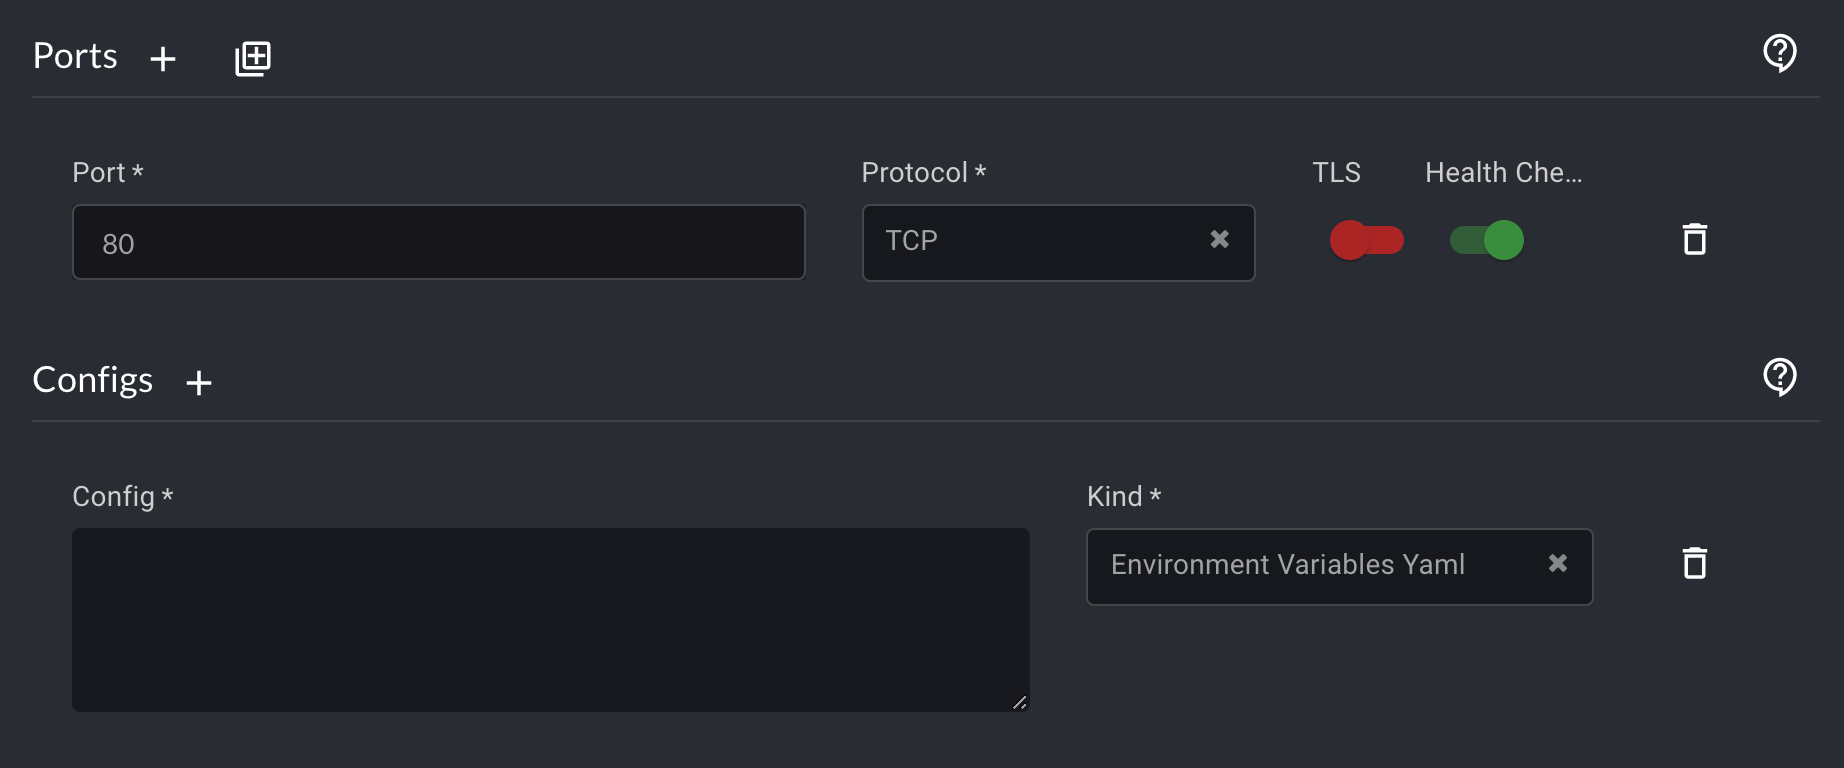
You can open the Ports and the Configs boxes by selecting the corresponding plus sign icons. In the Kind dropdown menu that appears, make sure you select Environment Variables Yaml.

The following is an example of configuring Environment Variables using the Configs box.

Once you have completed these steps, select the green box Create at the bottom of the page.
Create App Instances
An app instance is the deployment of app(s) through a cloudlet.
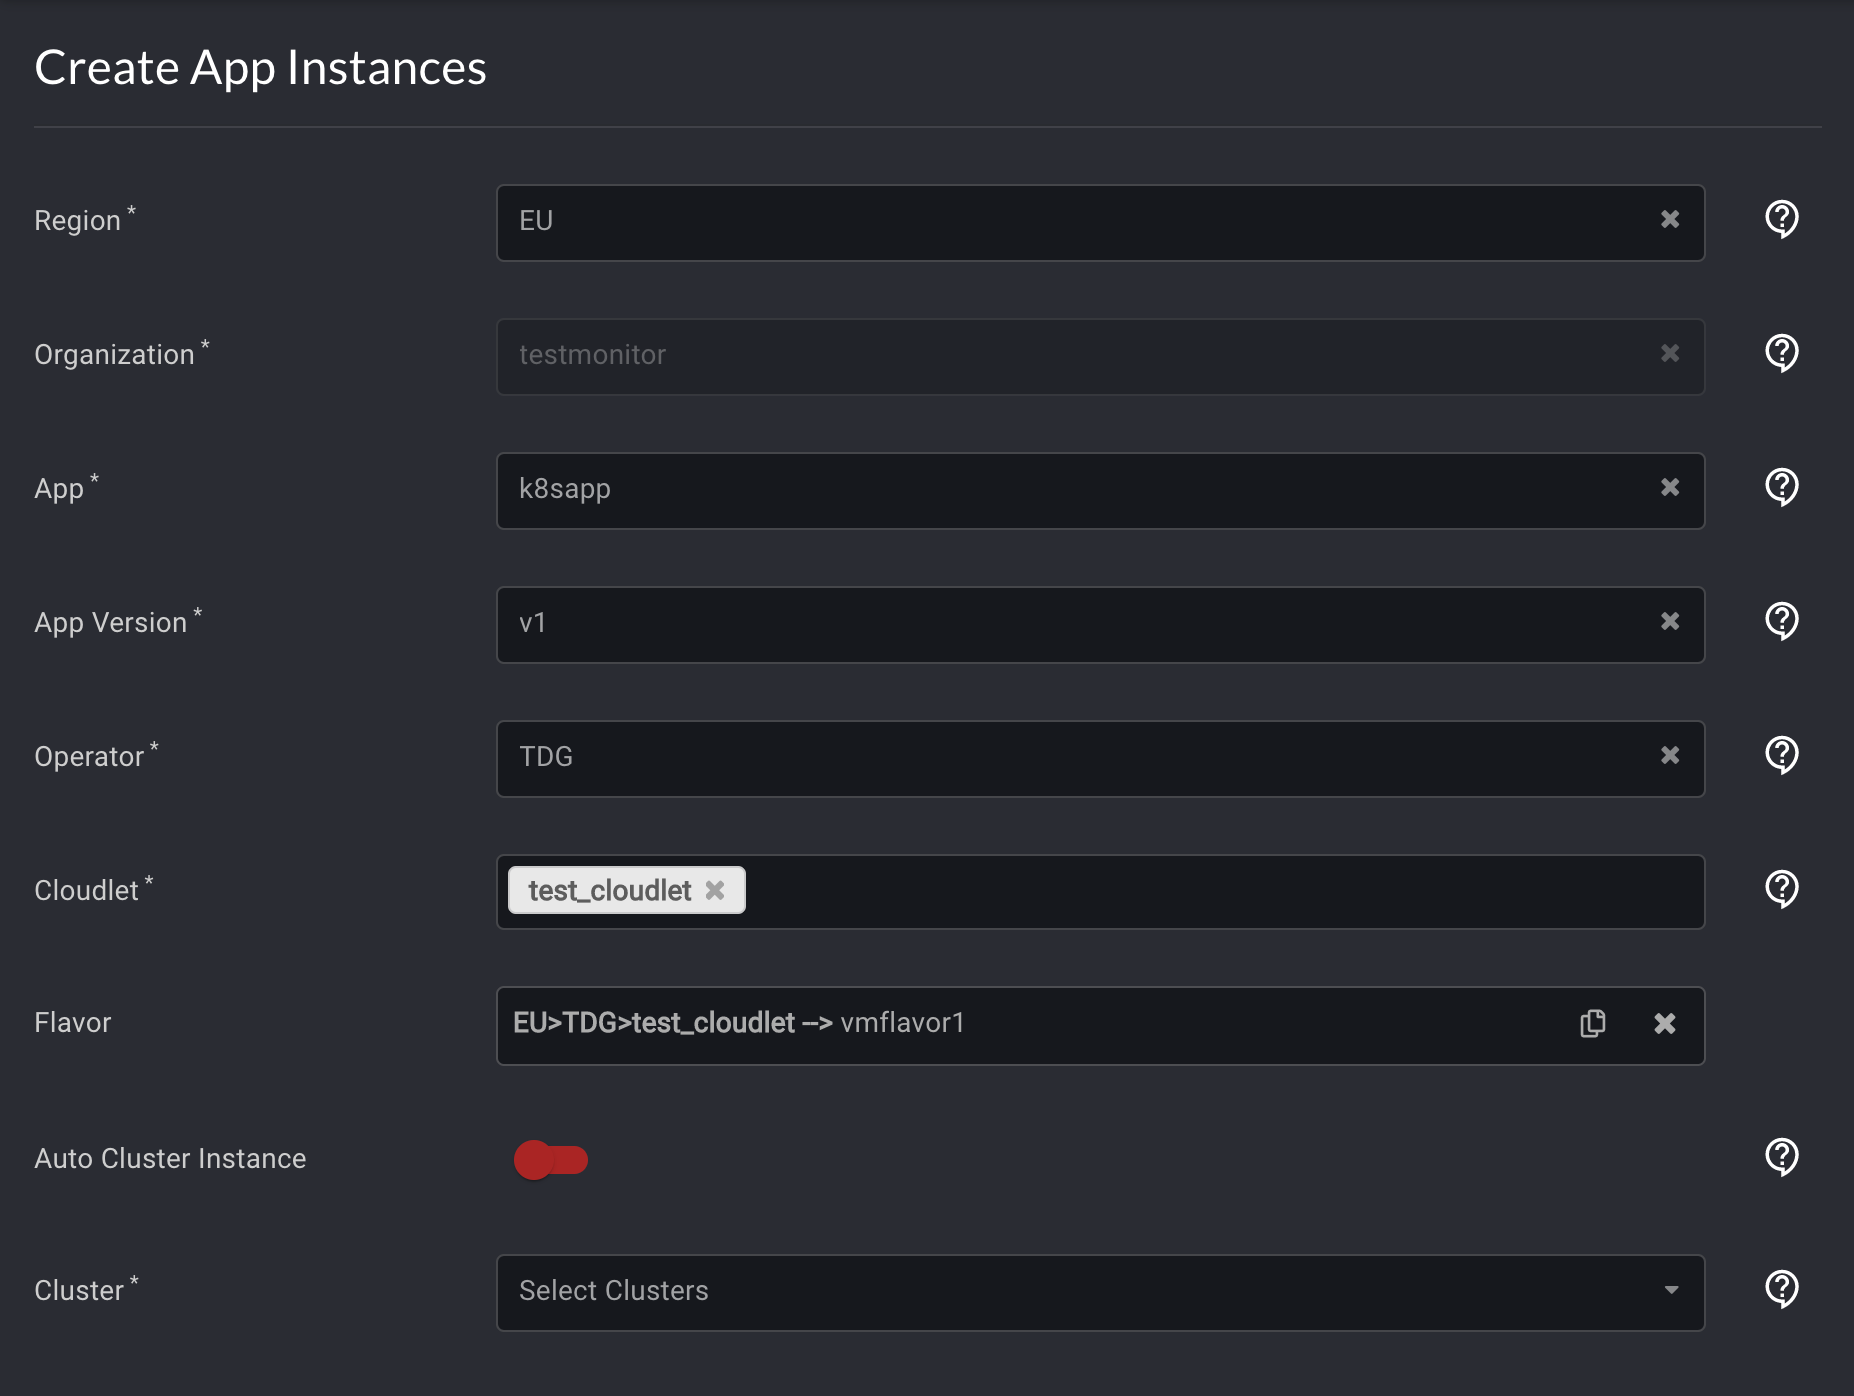
After creating the Kubernetes app, select App Instances in the left navigation. Then, in the top right corner, select the plus sign icon similar to the previous step.

Enter values in each box that correspond with your app. Then, select Create.
View Your Deployed App
On the Application Instance page click on the Application Instance you just created, which will provide a status of the Application. You should see a field called URI, which is the publicly accessible domain unique to your instance. For the example Hello World application, copy and paste that into a web browser and you should now see the Hello World webpage.

As a follow-up, visit the Auto Scaling with Kubernetes guide to learn how to scale your deployed application.