How To Deploy Windows VMs
Last Modified: 11/18/2021
In this tutorial, you will learn how to:
Setup a Windows Virtual Machine Image in the qcow2 format
Upload a Virtual Machine (VM) image to the EdgeXR Artifactory Registry
Deploy the VM (application) to a cloudlet using the EdgeXR Edge-Cloud Console
Prerequisites
A EdgeXR Console Account where you know your organization name.
Download and have installed qemu-system-x86_64
Step 1: Download Windows ISO Images
If Windows Server 2012 R2 meets your application requirements, Openstack has worked with Microsoft to provide a ready to use qcow2 formatted image that can be deployed directly to EdgeXR. This can be downloaded from the cloudbase website by clicking on the Download Evaluation Images button and choosing the KVM Image.
Note: If you choose to use this image, you can skip ahead in this guide to Step 6.
You may use any version of Windows that is suitable for your application. You can find Windows ISO images available to download for free from the Microsoft website.
Note: Certain versions of Windows do not work well in Cloud environments. For example, Windows 10 Home, Windows 10 Pro, and Windows 2016 Server Essentials limit the number of vCPUs that can be used based on the maximum CPU sockets, which can result in performance degradation. You may learn about some of the maximums for certain versions of Windows here.
You will also need a signed copy of the Windows virtio-win ISO drivers, which can be downloaded from the virto-win Github.
Step 2: Create an Empty qcow2 File
With the ISO file you just downloaded, we will need to use that to install Windows into a fresh Virtual Machine image in the qcow2 format. As part of qemu-system, qemu-img should also have been installed, which will allow you to create an empty qcow2 virtual machine image.
There are two parameters you will need to specify as part of the command:
The Name of the qcow2. In this example, it is called
windows.qcow2The Disk Space allocated for the Virtual Machine i.e. 30 GB. If this value is higher than the disk space for a given flavor you would like to use on EdgeXR, then the Virtual Machine will fail to load. As such, it is recommended to keep this value low to be compatible with as many flavors on EdgeXR as possible. You can expand the Disk Space later once an Application Instance has been created on EdgeXR if a flavor is chosen with more disk space available than the what you provision here.
qemu-img create -f qcow2 windows.qcow2 30GStep 3: Install Windows in QCOW2
Next, we need to install Windows into the empty QCOW2 file. To do this, we will need run the ISO in a Virtual Machine emulator. For this guide, we will be showing how to do this with qemu-system-x86_64.
To begin installation, you may use the following script with the following changes:
Change
WINIMGto point to the path of your Windows ISO Image FileChange
VIRTIMGto point to the path of your VirtIO-Win ISO Image FileChange
QCOWto point to the path of your empty QCOW2 Image File
#!/bin/sh
WINIMG=Win10_2004_English_x64.iso
VIRTIMG=virtio-win-0.1.185.iso
QCOW=windows.qcow2
qemu-system-x86_64 -drive driver=qcow2,file=${QCOW},if=virtio -m 4096 \ -nic user,model=virtio -cdrom ${WINIMG} \ -drive file=${VIRTIMG},index=3,media=cdrom \ -rtc base=localtime,clock=host \ -accel hvf
This will open up a window to the Virtual Machine emulator which will start the Windows Installation process.
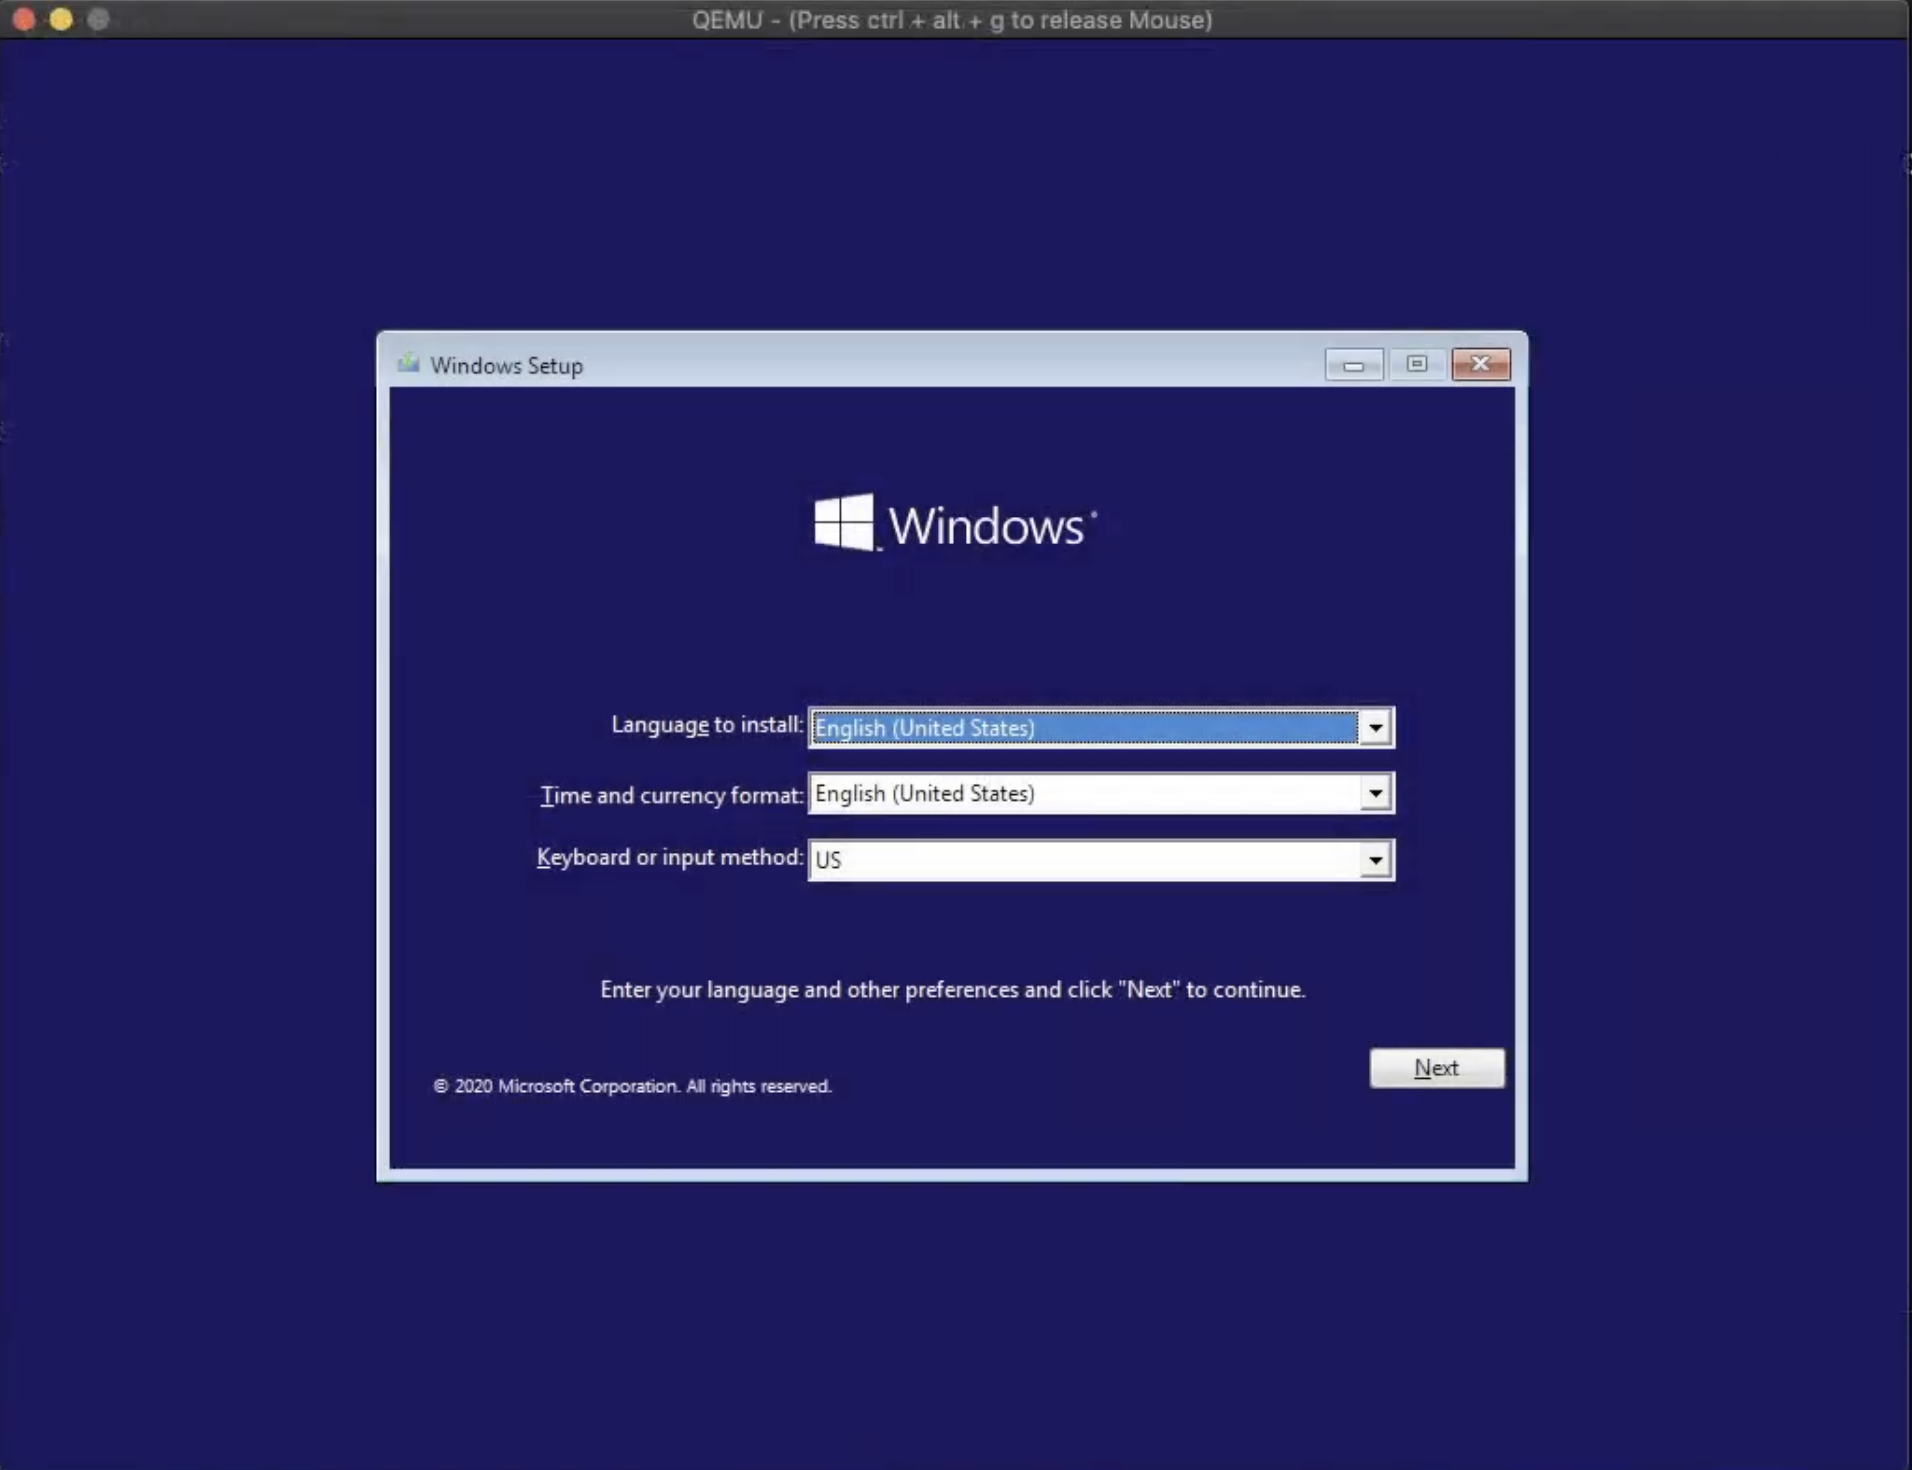
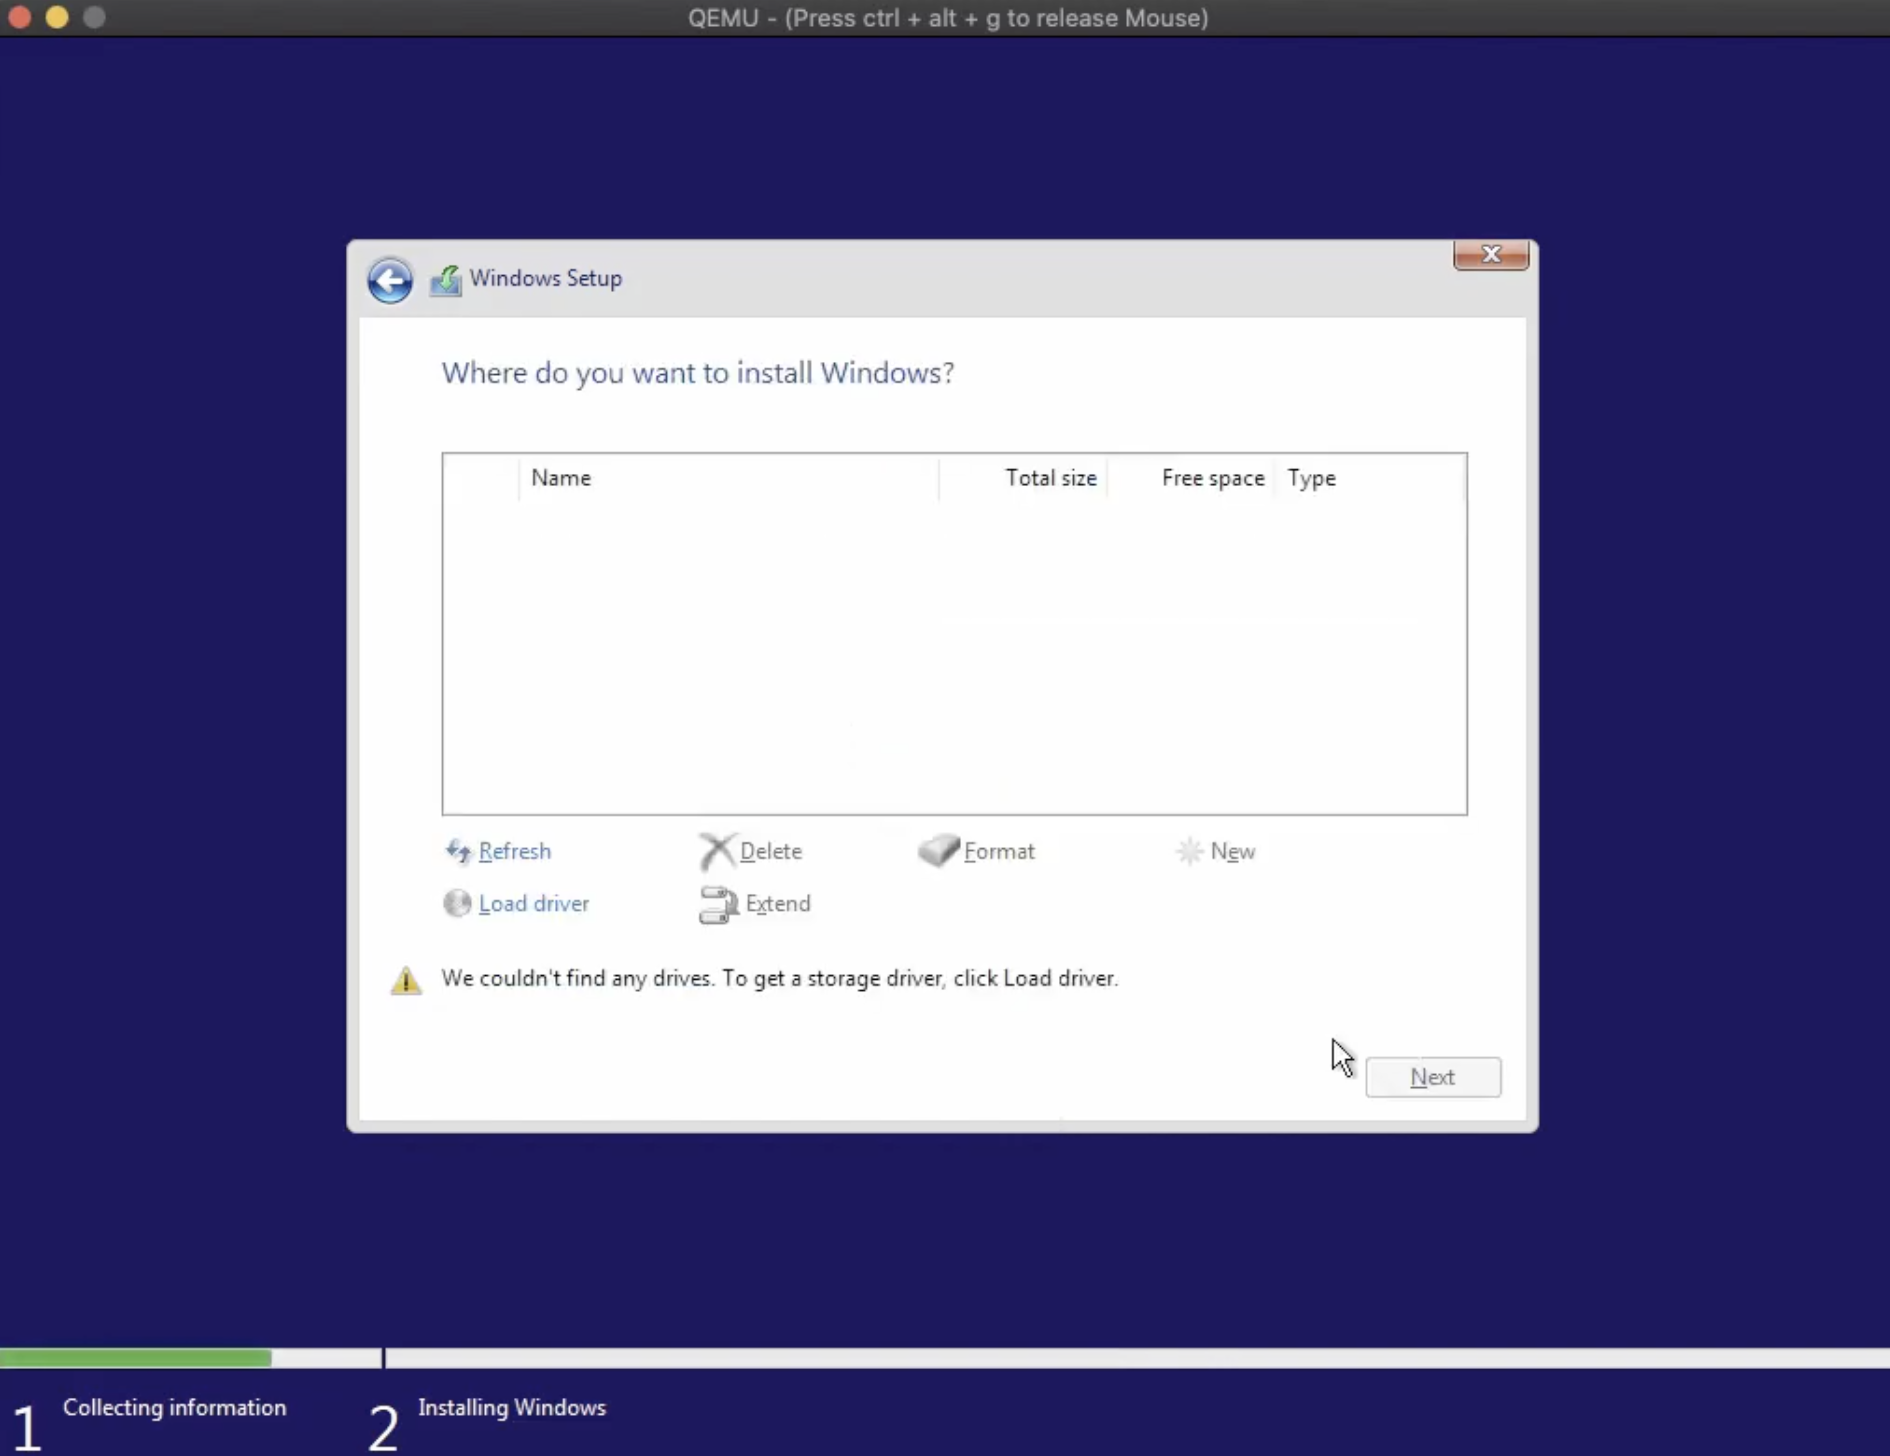
Continue through the Windows Installation process until you get to an empty Windows page that asks which drive to install Windows. Select Load Drivers to select the Windows VirtIO drivers to load. Choose the Red Hat VirtIO SCSI controller that corresponds to the version of Windows you are trying to install. For example, if you are installing Windows Server 2019, then select the driver with 2K19 in the path.
Then, continue through the Windows Installation process, until you are able to log in to your VM.
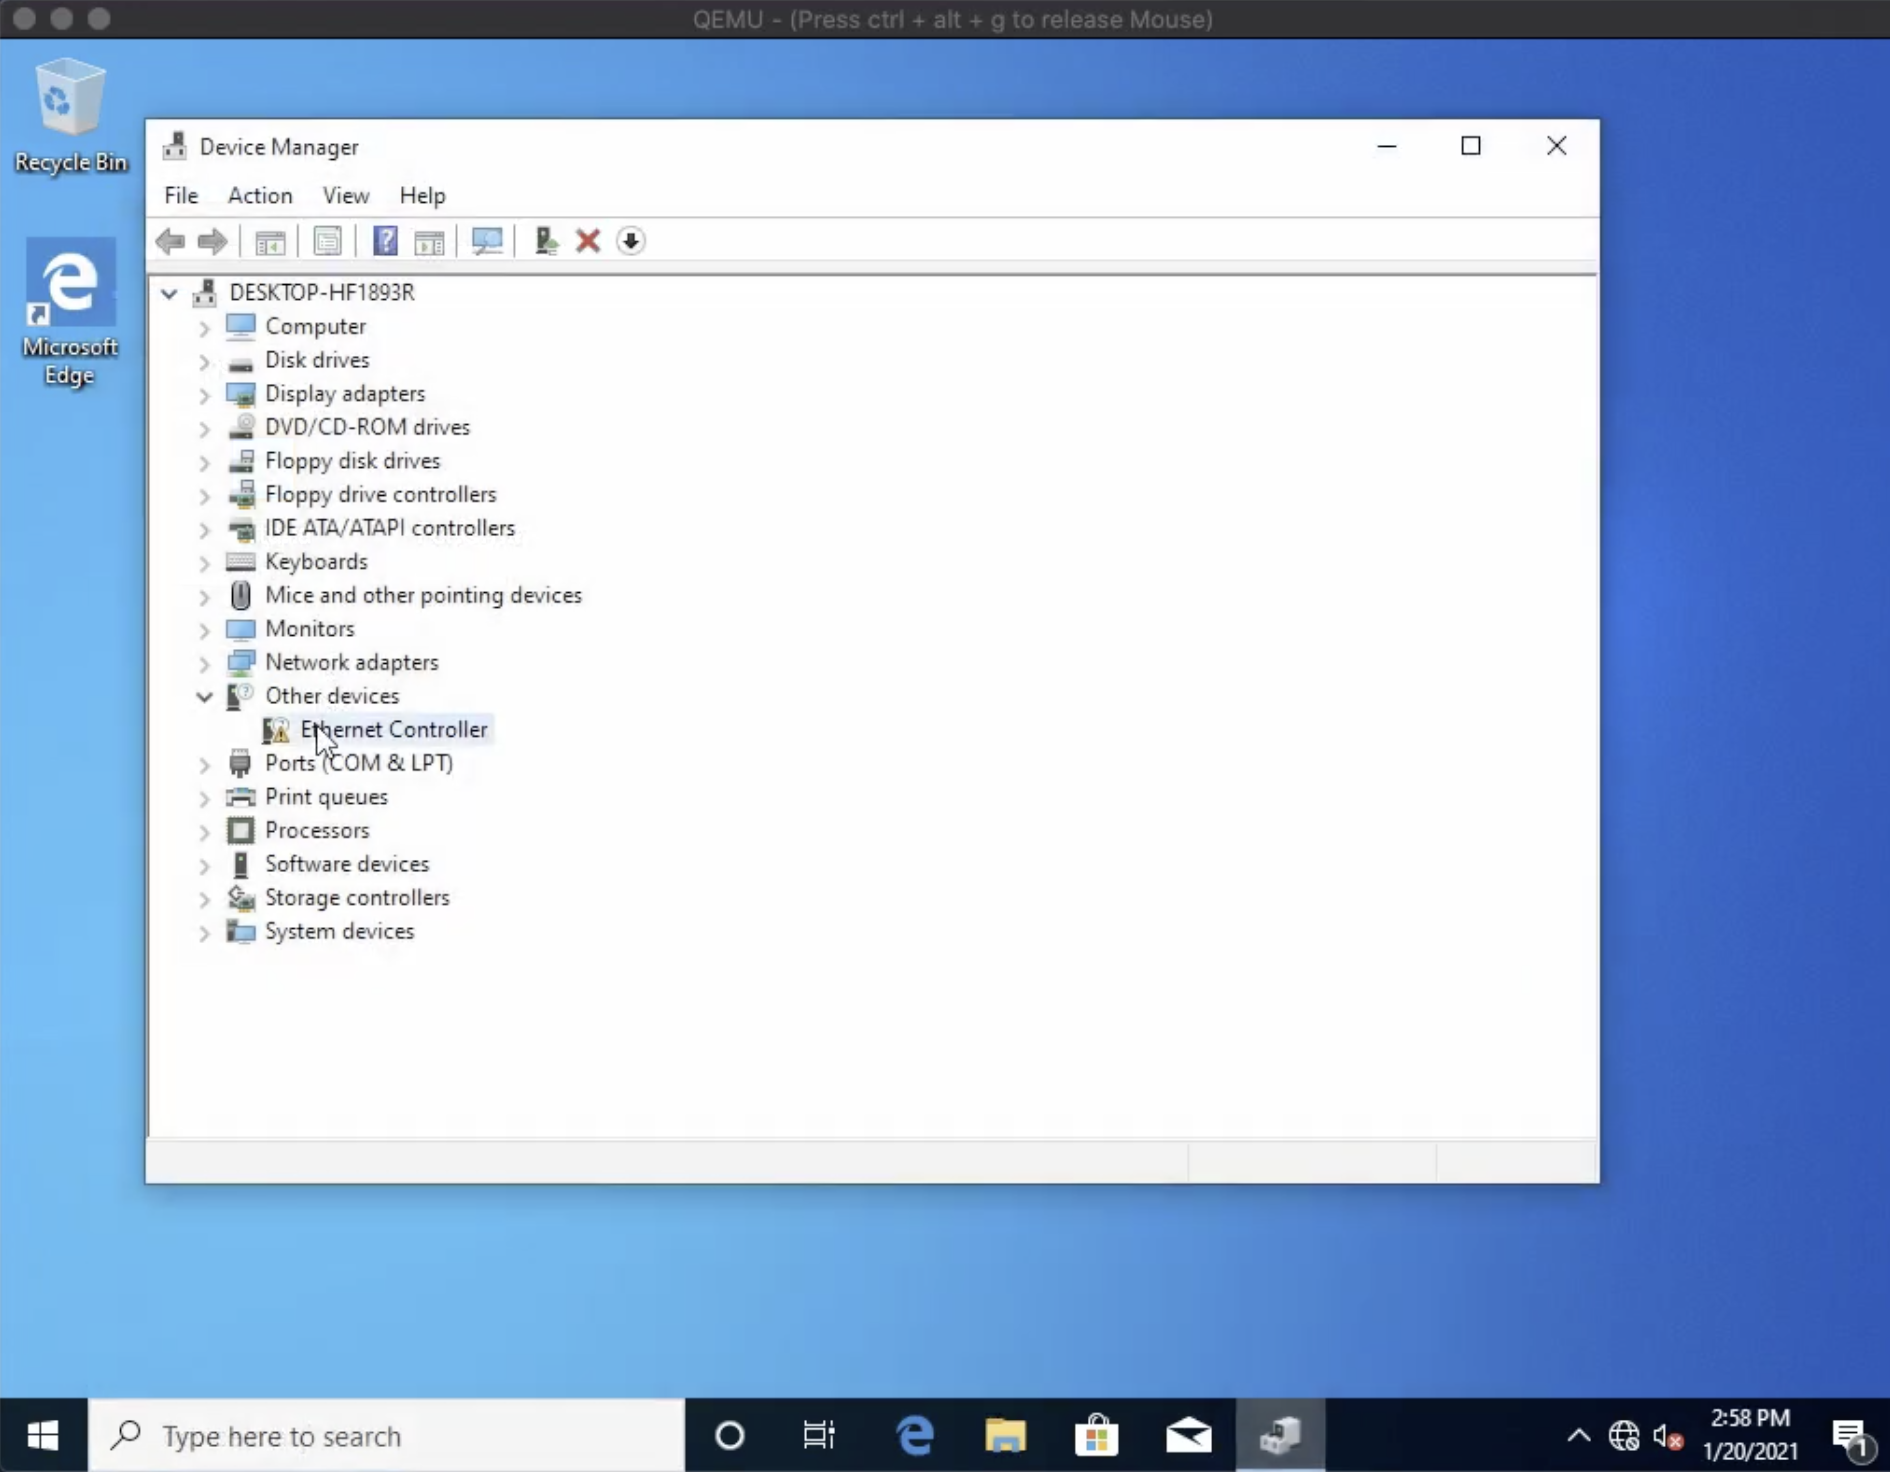
Step 4: Enable Internet Access for the Virtual Machine
Step 5: Enable Remote Desktop Protocol (optional)
To make maintaining Windows Virtual Machine applications once an application instance is created easier, it is recommend to enable Remote Desktop Protocol (RDP). To do so, open Start > Settings > System > Remote Desktop, and turn on Enable Remote Desktop. In order to use RDP, you will need to open port 3389 TCP, which will be shown in following steps.
For more information on RDP, you may refer to the Microsoft Support Page.
Step 6: Upload the VM image file to the EdgeXR Artifactory
If your VM is still running, save and exit the machine.
On the command line, verify that your qcow2 image is in your working directory.
Upload the image to the EdgeXR Artifactory by typing in
curl -u <username> -T ./windows.qcow2 "https://console.cloud.edgexr.org/storage/v1/artifacts/<orgname>/windows.qcow2" --progress-bar -o upload.txtusernamecorresponds to the username that you use for the EdgeXR Console.orgnamecorresponds to the developer organization that you created on EdgeXR which you would like to have access to your Virtual Machine
Once prompted, type in your username and password to proceed.
Curl will upload the image to Artifactory. If the upload was successful, you will receive an output similar to the example below. If it was unsuccessful, you will receive an error message. For example, if you received the error Bad Credentials, it may be that your username, password, or organization were invalid, in which case, you will need to go back and type them in correctly.
Once the image has been uploaded to the EdgeXR Artifactory, you may login to the EdgeXR Artifactory to verify: https://console.cloud.edgexr.org/storage/v1/artifacts
$ curl -q -u demo -T ./windows.qcow2 "https://console.cloud.edgexr.org/storage/v1/artifacts/demoorg/windows.qcow2" --progress
Enter host password for user 'demo':
{
  "repo" : "repo-demoorg",
  "path" : "/windows.qcow2",
  "created" : "2020-04-09T14:23:27.958Z",
  "createdBy" : "demo",
  "downloadUri" : "https://console.cloud.edgexr.org/storage/v1/artifacts/demoorg/windows.qcow2",
  "mimeType" : "application/octet-stream",
  "size" : "941359104",
  "checksums" : {
    "sha1" : "0a60d34921a5e922aeacfeece13bd5ccfb024cb3",
    "md5" : "ec8c38b1656ded3e03a6dc0938e201f1",
    "sha256" : "b376afdc0150601f15e53516327d9832216e01a300fecfc302066e36e2ac2b39"
  },
  "originalChecksums" : {
    "sha256" : "b376afdc0150601f15e53516327d9832216e01a300fecfc302066e36e2ac2b39"
  },
  "uri" : "https://console.cloud.edgexr.org/storage/v1/artifacts/demoorg/windows.qcow2"
}%
The proceeding steps require you to have an md5 sum. Note that the md5 is returned as shown in the example above and you can also copy it from Artifactory after you login at a later point in time.
Step 7: Create an application definition
You are now ready to create an application. The Apps page lets you define your backend application deploying to our registry. Performing this steps creates an 'inventory' of your applications that are part of the registry and prepares it for deployment. Below are the settings recommended for running the CentOS-7 Sample Virtual Machine
From the left navigation, select Apps. The Apps page opens.
Select the plus sign icon to add a new Application definition. The Create Apps page opens.
Select a for Region where you would like your app to be deployed. You may select more than 1. At this time, it is recommended to choose at least EU.
For App Name, type in a name, such as vmtest.
For App Version, type in a version, such as 1.0.
For Deployment Type, select VM.
For VM App OS Type, select the appropriate version of Windows.
Select Qcow for Image Type.
For Image Path, enter
https://console.cloud.edgexr.org/storage/v1/artifacts/demoorg/windows#md5:ec8c38b1656ded3e03a6dc0938e201f1, where md5sum is in the format of #md5:sumFor Default Flavor, select EU>m4.small.
For Port, enter 3389, and select TCP for RDP.
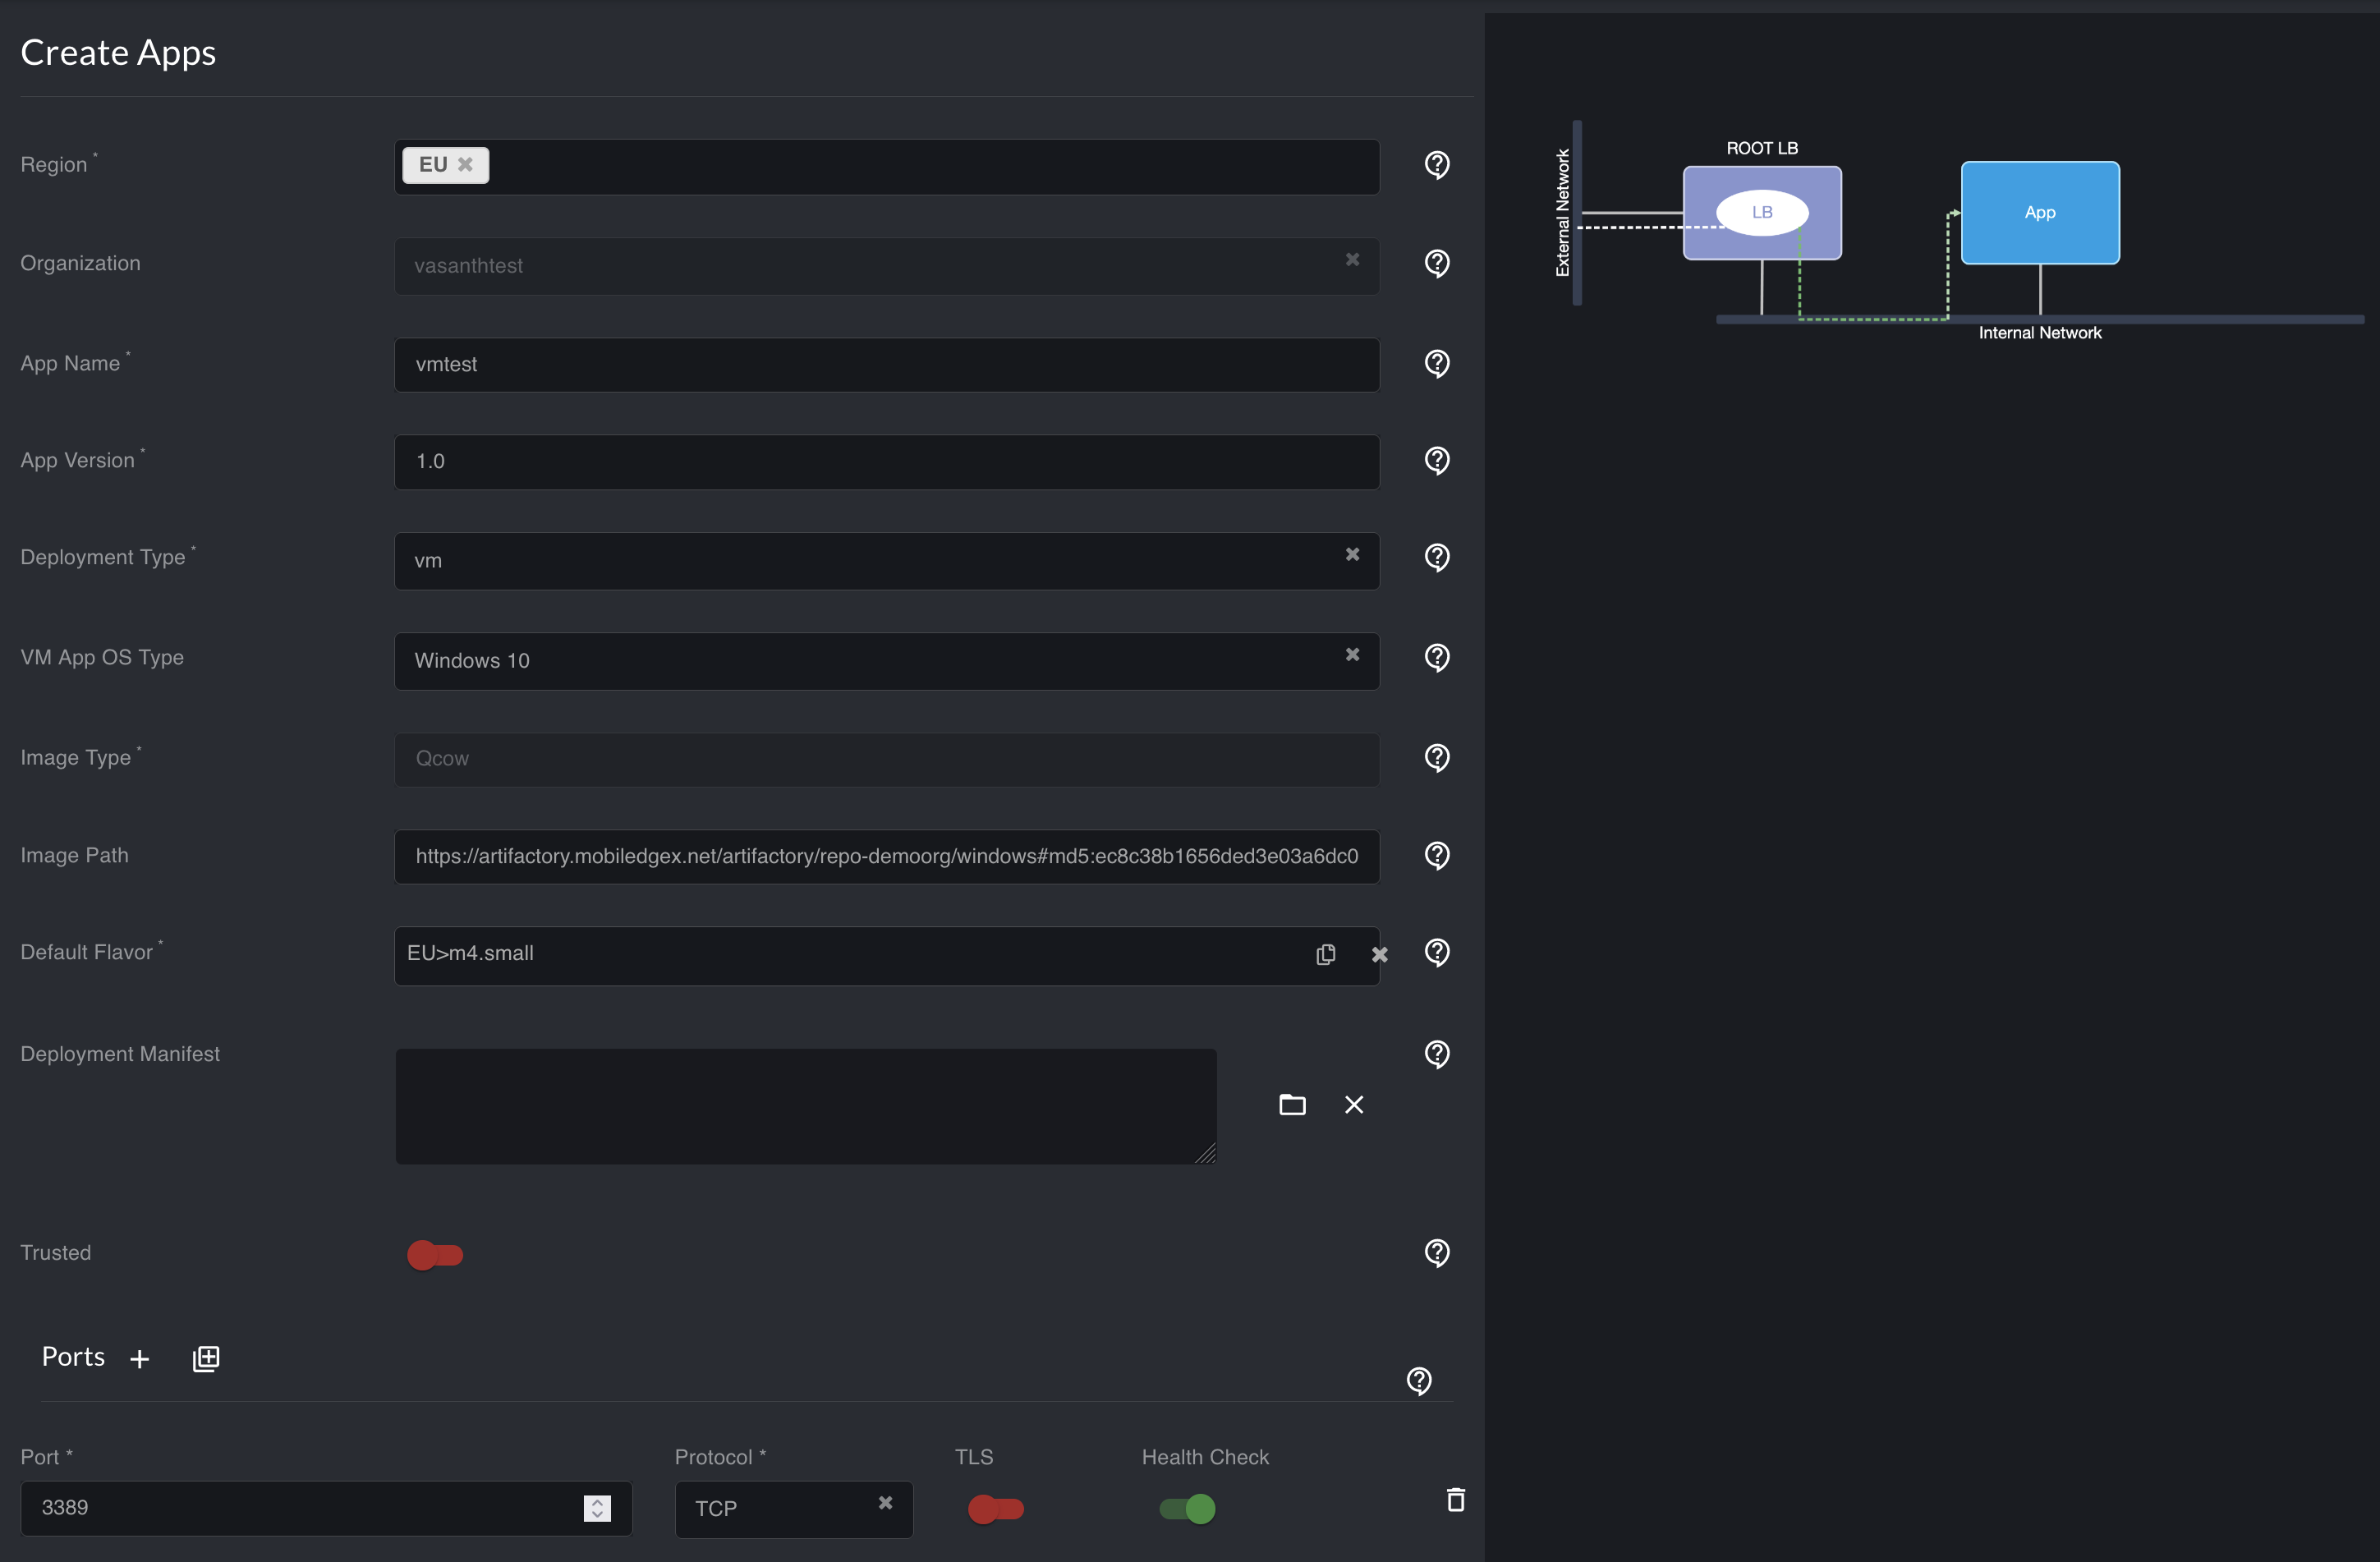
The console will process your request and return you to the Apps screen where you should see your application.
Step 8: Create an application instance
You are ready to deploy your application. The App Instances page is where you provision your application and deploy it to a cloudlet. This step is called application provisioning. This page displays information such as the current applications running on the platform and their location.
On the left navigation, select App Instances.
Select the plus sign icon in the top right corner. Populate the required fields on the following screen:
For Region, select EU.
For Organization Name, type in a name, such as demoorg.
Type vmtest for App Name.
For App Version, enter 1.0.
For Operator, select TDG.
For Cloudlet, select from the list of available cloudlets i.e. munich-main.
Select Create. The console will process your request and bring up a progress window. Once you close out of the progress window, you will be returned to the main App Instance page where you should see your new VM Instance.
Step 9: Test your VM
After the VM has been successfully provisioned, select the Application Instance in order to view the Application Instance Details page. This page will contain all the information specific to your VM Deployment, including the external IP address to connect to the instance.
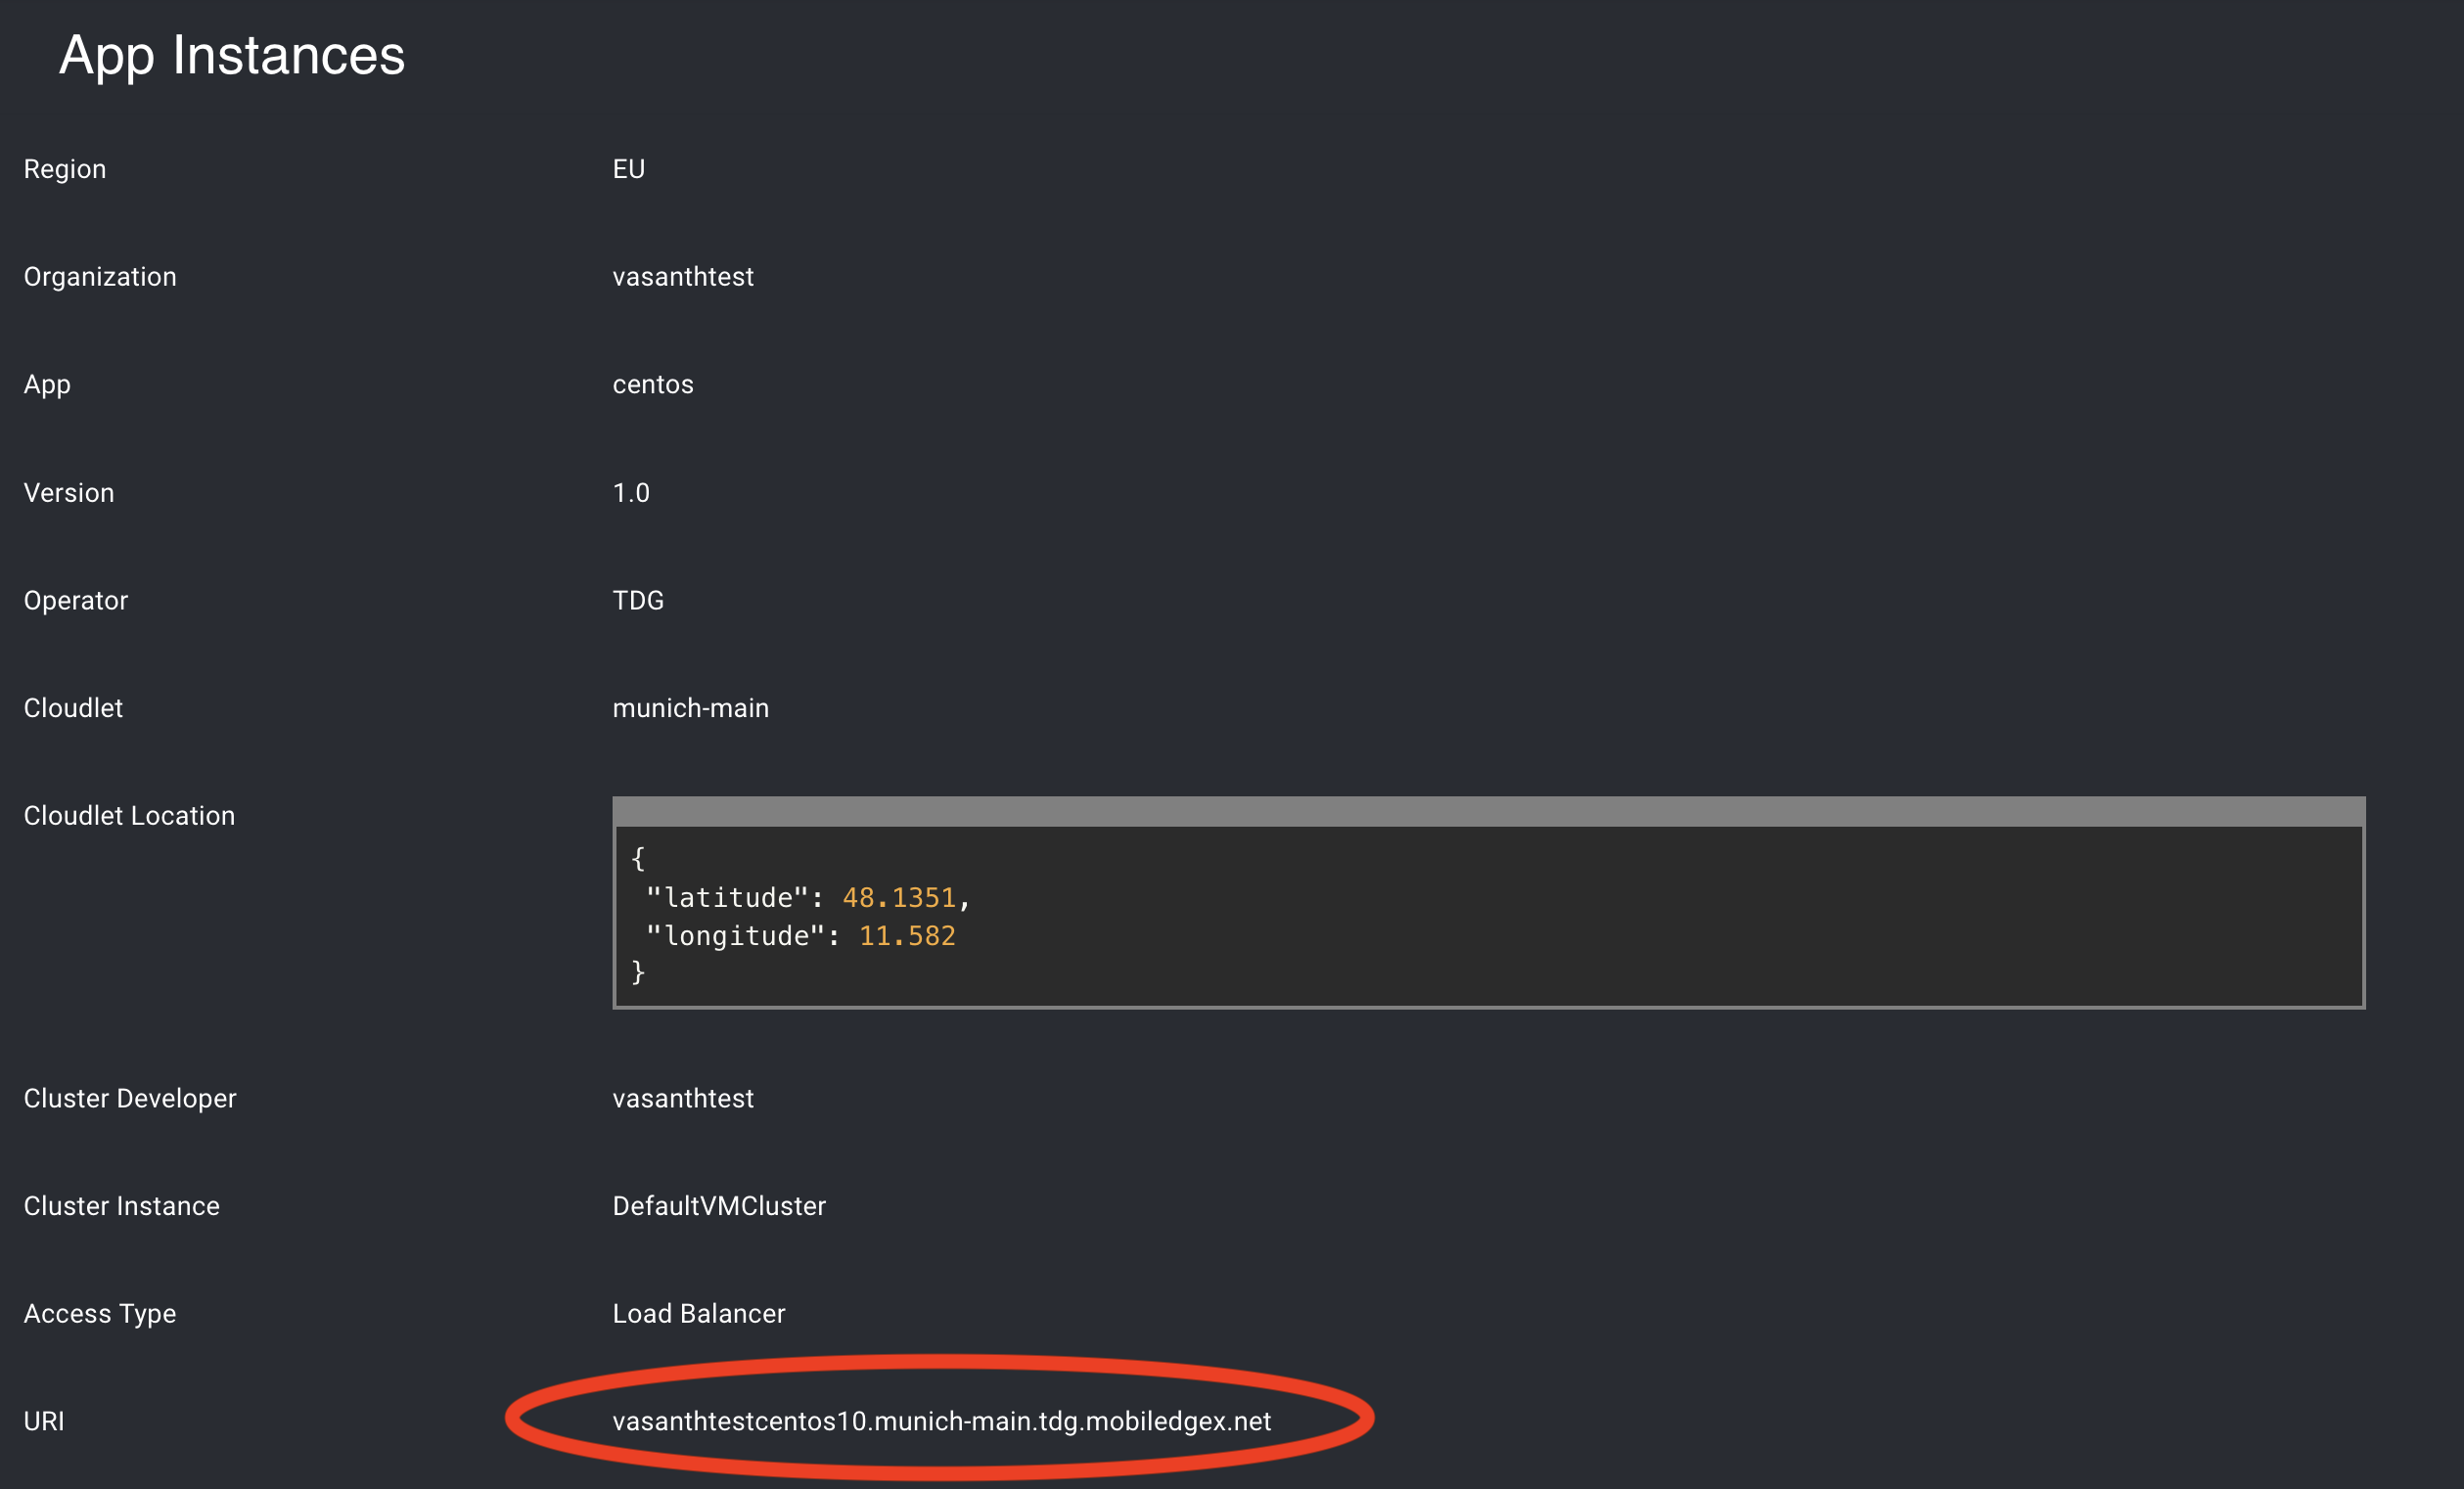
To test that your VM was deployed correctly, navigate to the App Instance page and under the quick access menu, select Terminal.
Note: Not all Cloudlets will support this feature and if you run into errors for a specific cloudlet, it is recommended to connect to the App Instance via RDP has mentioned above.
