Deploy Helm V3
Helm is a packaging manager for Kubernetes. This guide will help show you how to use Helm charts to package your app and deploy it. EdgeXR does not host these charts, but can access any public repositories you intend to use.
Before continuing, make sure you have read about applications and learned how to create an app using the EdgeXR platform here.
Creating Apps
In the EdgeXR platform left navigation, select Apps. Then, in the top right corner, click the plus sign icon. This will take you to the Create Apps page.

Below is a screenshot of a sample helm-based app creation.

There are several important parts that are specific to helm:
In the Deployment Type box, enter helm.
The Image Path box contains both the chart name as well as chart repo path. In the example above the path https://ealenn.github.io/charts:ealenn/echo-server represents the following two helm commands:
$ helm repo add ealenn https://ealenn.github.io/charts
$ helm install ealenn/echo-server
So the structure of the Image Path is this :
[http or https path to helm chart repo]:[repo-name/chart-name]For the other boxes, you should enter the relevant information for your app.
Specifying a chart version
Charts are a packaging form for Kubernetes. They will have a version number, which you can specify using the EdgeXR platform.

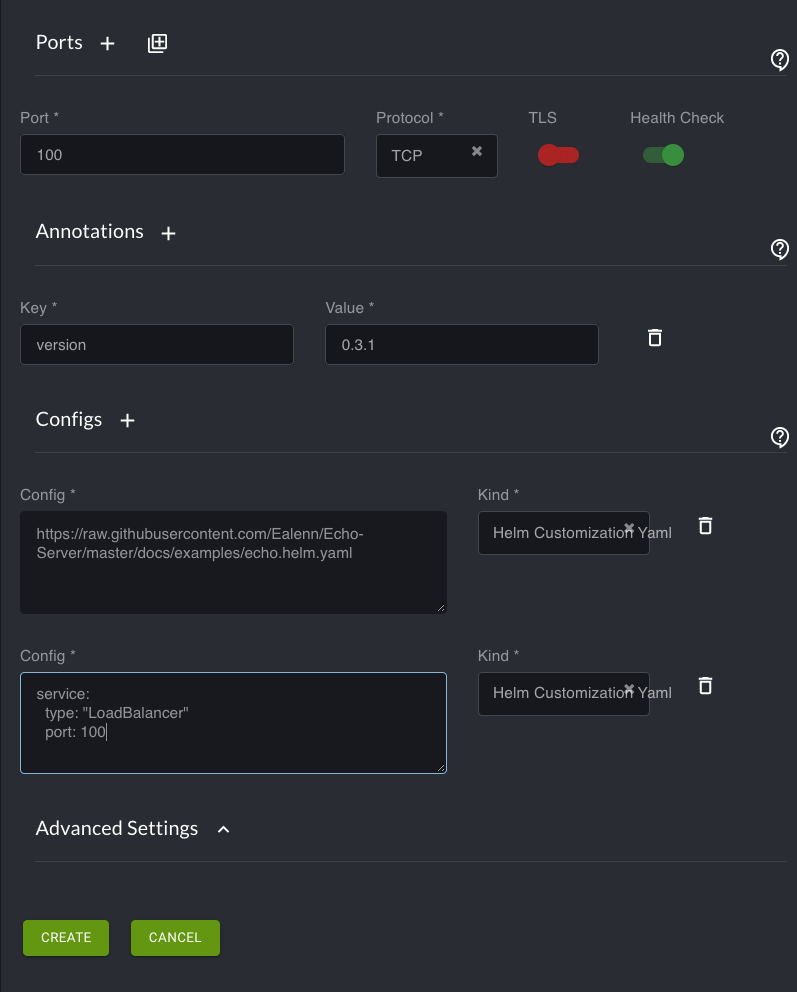
Under Annotations on the Create App page you can specify version for a key and a specific chart version you are trying to deploy. This is equivalent to:
helm install ealenn/echo-server --version 0.3.1Specifying chart customizations (i.e. values.yaml)
There are two ways to provide chart customization values when creating a helm-based App on EdgeXR platform under Configs on the App Creation page. Begin by expanding the Configs menu by selecting the adjacent plus sign icon:

Either paste the customization values directly into the Config box, or provide an internet reachable path to the chart customization values. (You can use more than one of these, but one of each type is not required).
In the Kind dropdown menu, make sure you select Helm Customization Yaml.
For this specific example, the TCP Port configured has to match the port configured in the custom Config.
Under Ports, consult the Specifying Application Definition of the Application Definition page for correct procedure.
Once you have completed these steps, select the green box Create at the bottom of the page.
Create App Instances
An app instance is the deployment of app(s) through a cloudlet.
After creating the helm-based app, select App Instances in the left navigation. Then, in the top right corner, click the plus sign icon similar to the previous step. The app instance creation is the same as for Docker, or K8s App Instance.

Enter values in each box that correspond with your app. Then, select Create.
See Your Deployed App
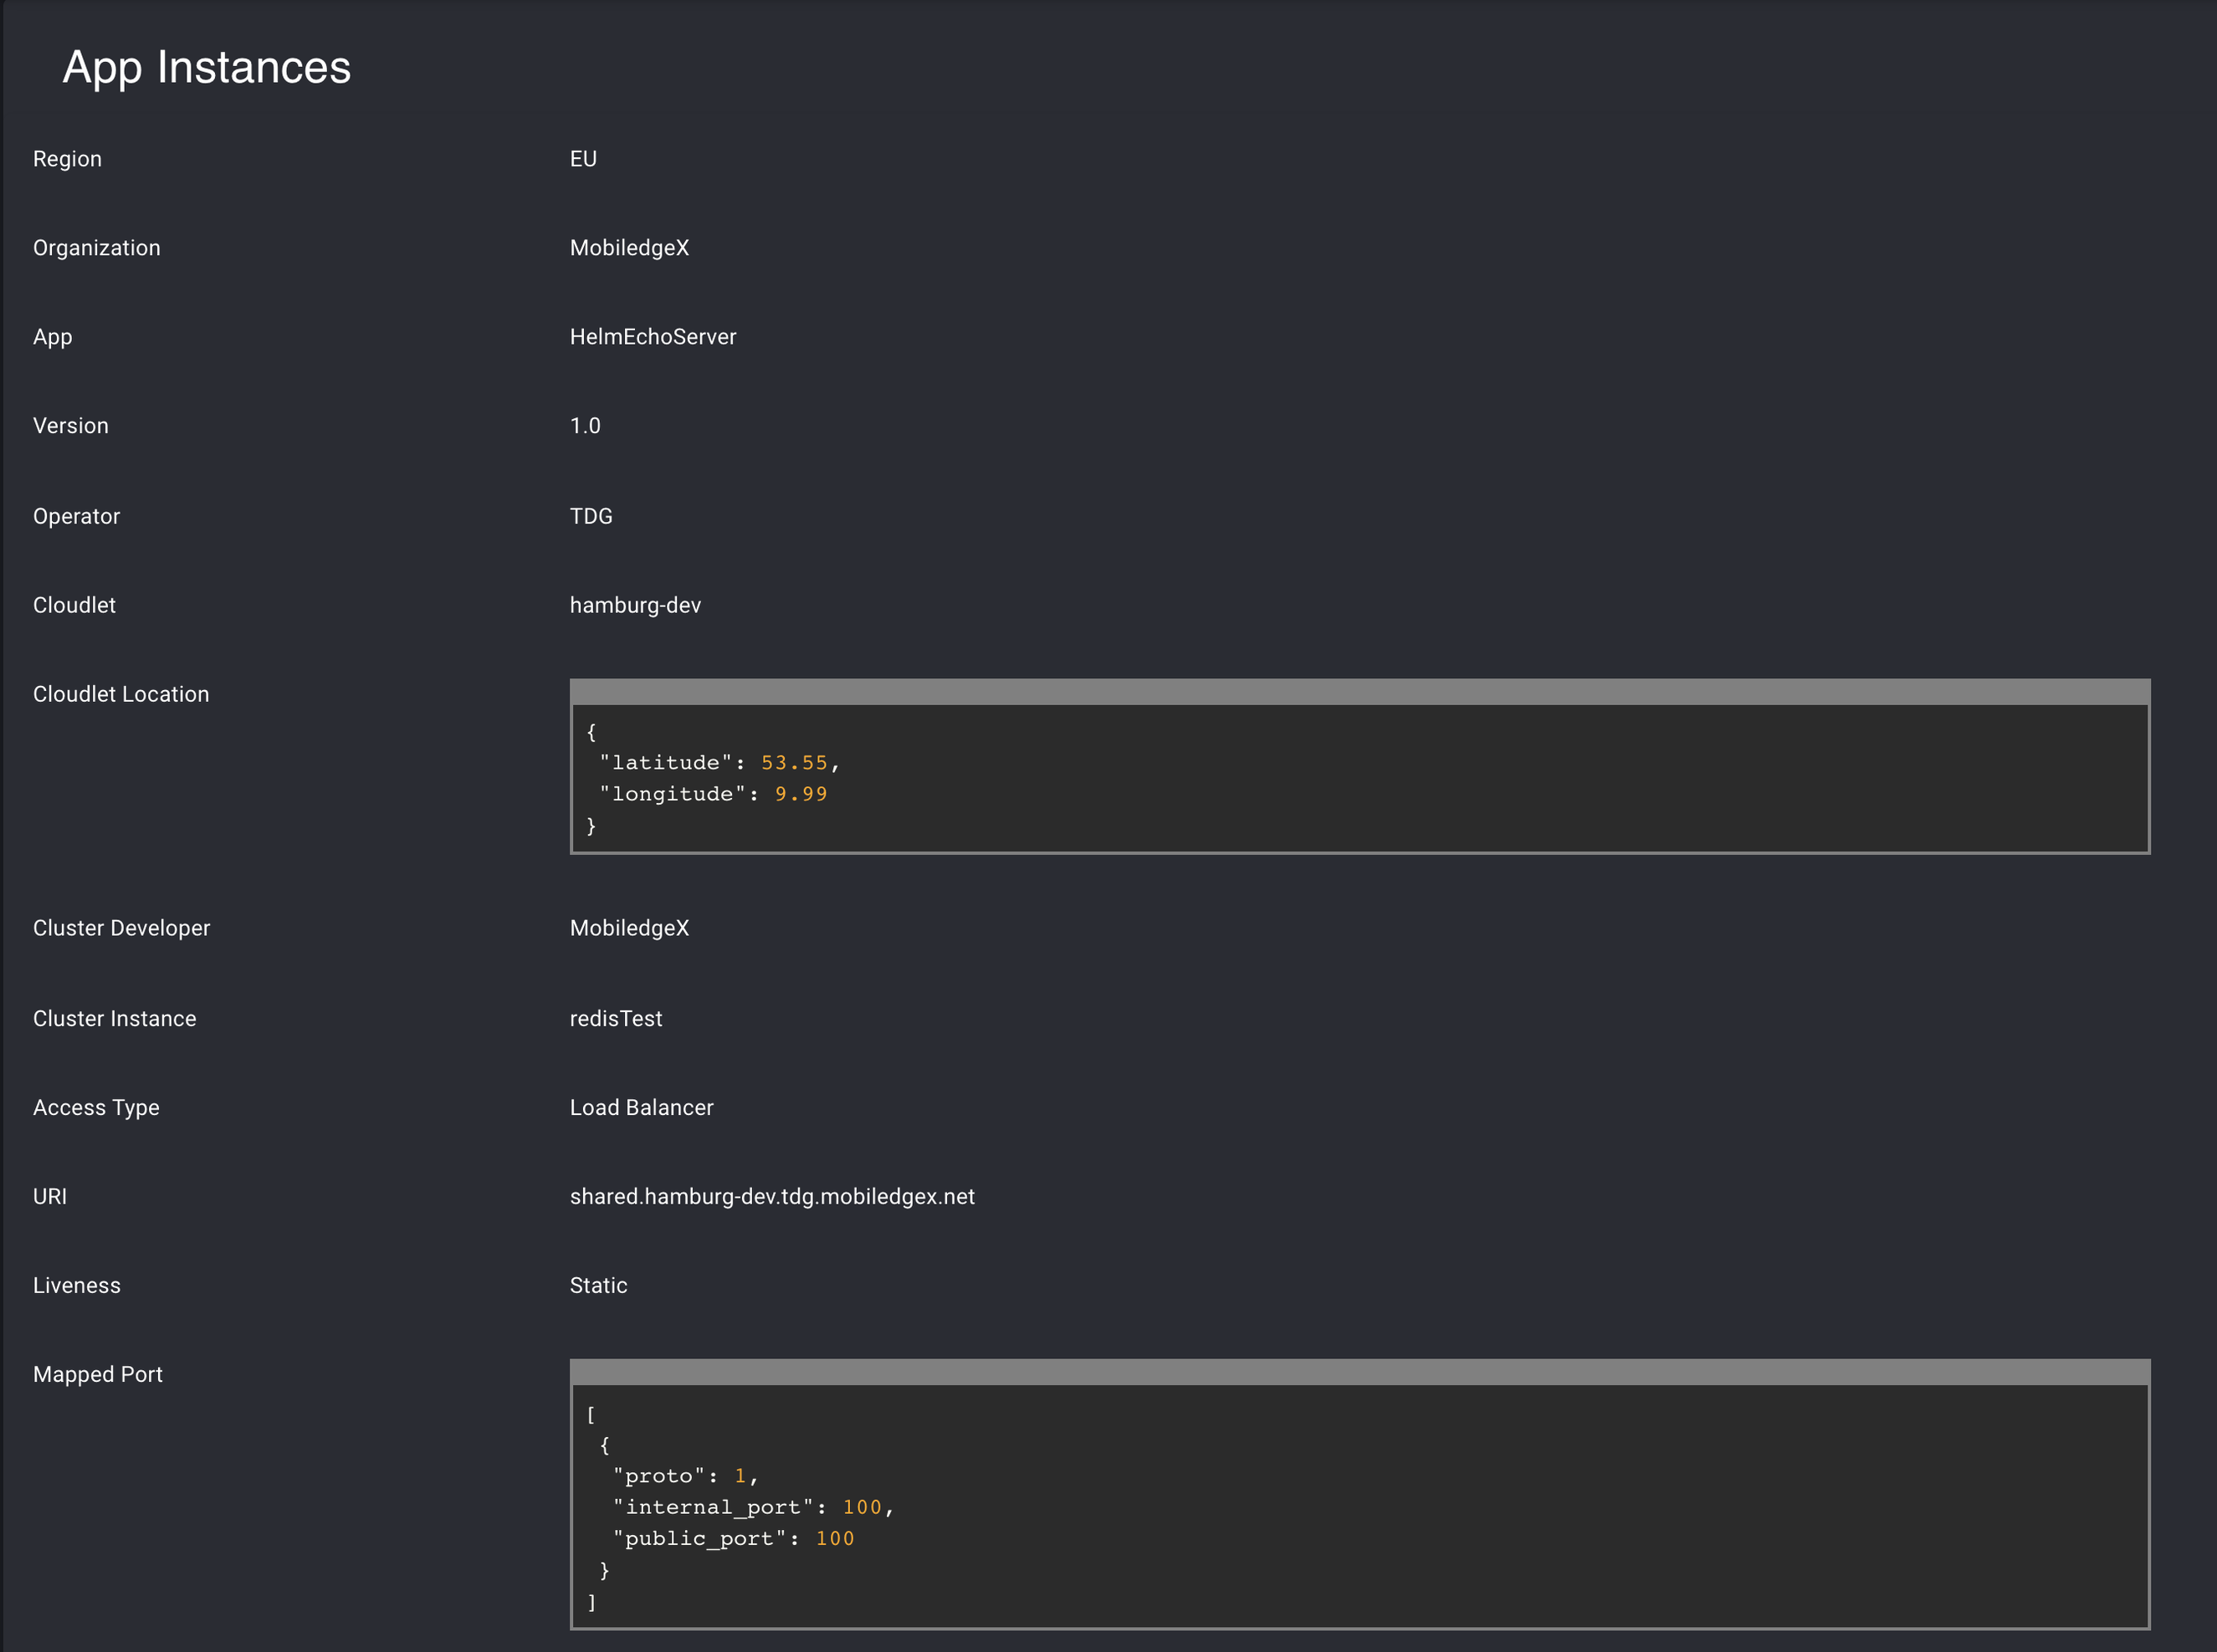
After the successful deployment, you can see the status of your app in the App Instances page.

The application we just deployed on EdgeXR using Helm is an echo server. An echo server will simply echo back the parameter that you pass as an argument to server. For example, using the FQDN and setting the parameter echo_body to hello world, we see that the output html page prints hello world. In other words, any content you pass into the echo_body parameter will be echoed back to you. From the URI and Mapped Ports sections you can gather the address to reach this echo server via assigned URL:

You can also reach this echo server directly via terminal:
$ curl http://shared.hamburg-dev-tdg.eu.app.tdg.edgexr.org:100/?echo_body=hello "hello"
$