How To Deploy Linux VMs
Last Modified: 11/18/21
In this tutorial, you will learn how to:
Upload a Virtual Machine (VM) image to the EdgeXR Artifactory Registry
Deploy the VM application to a cloudlet using the EdgeXR Edge-Cloud Console
Prerequisites
A EdgeXR Console Account where you know your organization name.
A Virtual Machine image in QCOW2 format. Instructions to download a sample image are provided below.
Step 1: Setup a VM image file
For your application, you will need to download and setup a VM image. Depending on your use case, you may choose to either setup the VM with your application baked into the image file or alternatively setup your application after it is deployed on EdgeXR, which may help to reduce the file size of your image.
If you already have a VM image, you will need to convert it to the qcow2 format. We recommend trying the qemu-img convert tool. For example,
qemu-img convert ubuntu.vdi ubuntu.qcow2Note: Depending on the state of the image, this process may not work and you might be required to install the image into an empty qcow2. To learn more about this, please refer to our Windows VM installation guide.
If you do not have a VM image and would like to continue with the tutorial, you may download the CentOS-7 qcow2 image from their website: https://cloud.centos.org/centos/7/images/CentOS-7-x86_64-GenericCloud.qcow2
Step 2: Enable SSH (optional)
If you would like to SSH into your VM and your VM does not support Cloud Init, then it is required to change the port in your VM image for SSH. This is because the default port 22 for SSH is a reserved port on EdgeXR.
For the CentOS sample image mentioned above, Cloud Init is enabled and so you can skip this step to enable SSH.
For VMs that do not support Cloud Init, you may do the following to change the port for SSH:
Open the VM in a VM emulator like
Virtual Boxorqemu-system-x86_64Once that image is running, open the file
/etc/ssh/sshd_configCheck if a port has been specified. If so, change the port to
2222. If not, addPort 2222to this file.Shut down the image in order to save the changes.
Step 3: Upload the VM image file to the EdgeXR Artifactory
On the command line, verify that your image is in your working directory.
Upload the image to the EdgeXR Artifactory by typing in
curl -u <username> -T ./CentOS-7-x8664-GenericCloud.qcow2 "https://console.cloud.edgexr.org/storage/v1/artifacts/lt;orgname>/CentOS-7-x8664-GenericCloud.qcow2" --progress-bar -o upload.txtusernamecorresponds to the username that you use for the EdgeXR Console.orgnamecorresponds to the developer organization that you created on EdgeXR which you would like to have access to your VM.
Once prompted, type in your user password to proceed.
Curl will upload the image to Artifactory. If the upload was successful, you will receive an output similar to the example below. If it was unsuccessful, you will receive an error message. For example, if you received the error "Bad Credentials", it may be that your username, password, or organization was invalid, in which case, you will need to go back and type them in correctly.
Once the image has been uploaded to the EdgeXR Artifactory, you may login to the EdgeXR Artifactory to verify: https://console.cloud.edgexr.org/storage/v1/artifacts
$ curl -q -u demo -T ./CentOS-7-x86_64-GenericCloud.qcow2 "https://console.cloud.edgexr.org/storage/v1/artifacts/demoorg/CentOS-7-x86_64-GenericCloud.qcow2" --progress
Enter host password for user 'demo':
{
  "repo" : "repo-demoorg",
  "path" : "/CentOS-7-x86_64-GenericCloud.qcow2",
  "created" : "2020-04-09T14:23:27.958Z",
  "createdBy" : "demo",
  "downloadUri" : "https://console.cloud.edgexr.org/storage/v1/artifacts/demoorg/CentOS-7-x86_64-GenericCloud.qcow2",
  "mimeType" : "application/octet-stream",
  "size" : "941359104",
  "checksums" : {
    "sha1" : "0a60d34921a5e922aeacfeece13bd5ccfb024cb3",
    "md5" : "ec8c38b1656ded3e03a6dc0938e201f1",
    "sha256" : "b376afdc0150601f15e53516327d9832216e01a300fecfc302066e36e2ac2b39"
  },
  "originalChecksums" : {
    "sha256" : "b376afdc0150601f15e53516327d9832216e01a300fecfc302066e36e2ac2b39"
  },
  "uri" : "https://console.cloud.edgexr.org/storage/v1/artifacts/demoorg/CentOS-7-x86_64-GenericCloud.qcow2"
}%
The proceeding steps require you to have an md5 sum. Note that the md5 is returned as shown in the example above and you can also copy it from Artifactory after you login at a later point in time.
Step 4: Create an Application Definition
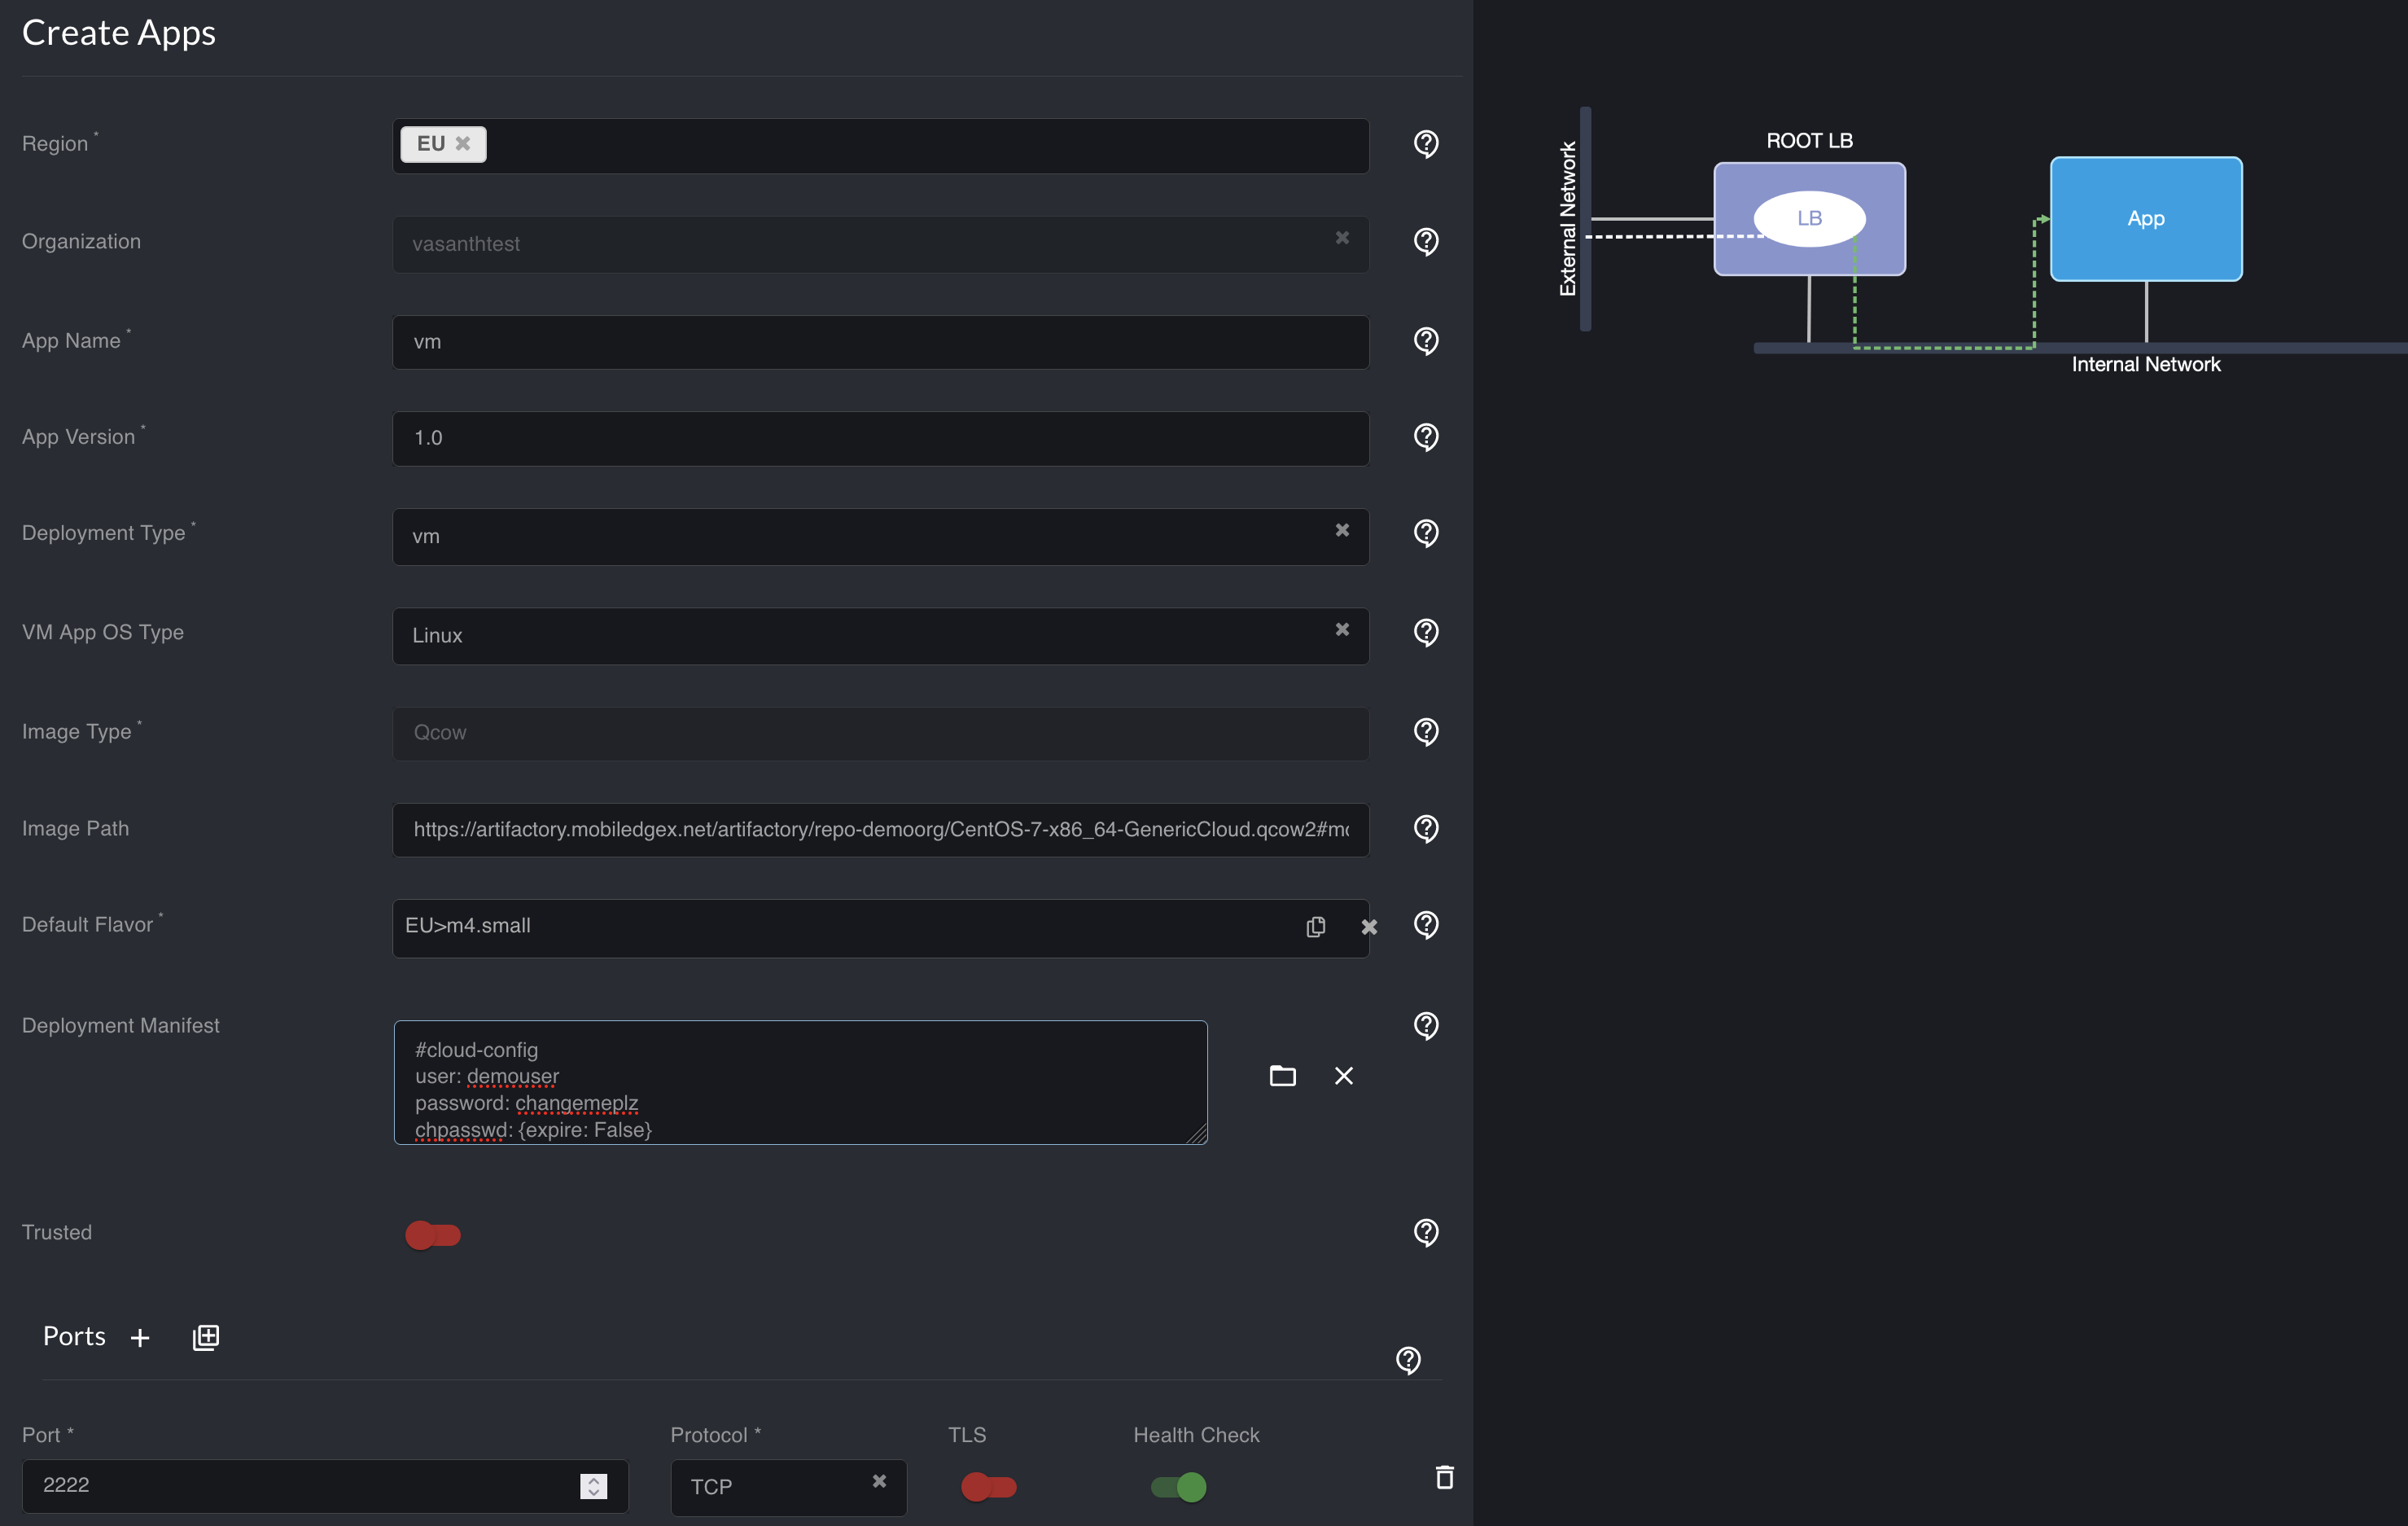
You are now ready to create an application. The Apps page lets you define your backend application deploying to our registry. Performing this steps creates an 'inventory' of your applications that are part of the registry and prepares it for deployment. Below are the settings recommended for running the CentOS-7 Sample Virtual Machine
From the left navigation, select Apps.
Select the plus sign icon to add a new Application definition. The Create Apps page opens.
Select a for Region where you would like your app to be deployed. You may select more than 1. At this time, it is recommended to choose at least EU.
For App Name, type in a name, such as vmtest.
For App Version, type in a version, such as 1.0.
For Deployment Type, select VM.
For VM App OS Type, select Linux.
Select Qcow for Image Type.
For Image Path, enter
https://console.cloud.edgexr.org/storage/v1/artifacts/demoorg/CentOS-7-x86_64-GenericCloud.qcow2#md5:ec8c38b1656ded3e03a6dc0938e201f1, where md5sum is in the format of #md5:sumFor Default Flavor, select EU>m4.small.
For Port, enter 2222, and select TCP or whichever port you choose to use for SSH.
Type the following into the Deployment Manifest. This is the user-data that will be used for cloud-init, which creates an account for the VM <
demouser,changemeplz> and update the SSH port for the VM to be2222.
#cloud-config
user: demouser
password: changemeplz
chpasswd: {expire: False}
ssh_pwauth: True
runcmd:
  - sed -i.bak -e 's/^[#]*Port .*$/Port 2222/' /etc/ssh/sshd_config
  - semanage port -a -t ssh_port_t -p tcp 2222
- sudo systemctl restart sshd.serviceNote: While optional, if you wish to SSH into your VM using SSH keys, make sure to add your SSH public key to the Auth Key section under Advanced Settings.

The console will process your request and return you to the Apps page where you should see your application.
Step 5: Create an Application Instance
You are ready to deploy your application. The App Instances page is where you provision your application and deploy it to a cloudlet. This step is called application provisioning. This page displays information such as the current applications running on the platform and their location.
1. On the left navigation, select App Instances.
2. For Region, select EU.
3. For Organization Name, type in a name, such as demoorg.
4. Type vmtest for App Name.
5. For App Version, enter 1.0.
6. For Operator, select TDG.
7. For Cloudlet, select from the list of available cloudlets i.e. munich-main.
8. Select Create. The console will process your request and bring up a progress window. Once you close out of the progress window, you will be returned to the main App Instance page where you should see your new VM Instance.
Step 6: Test your VM
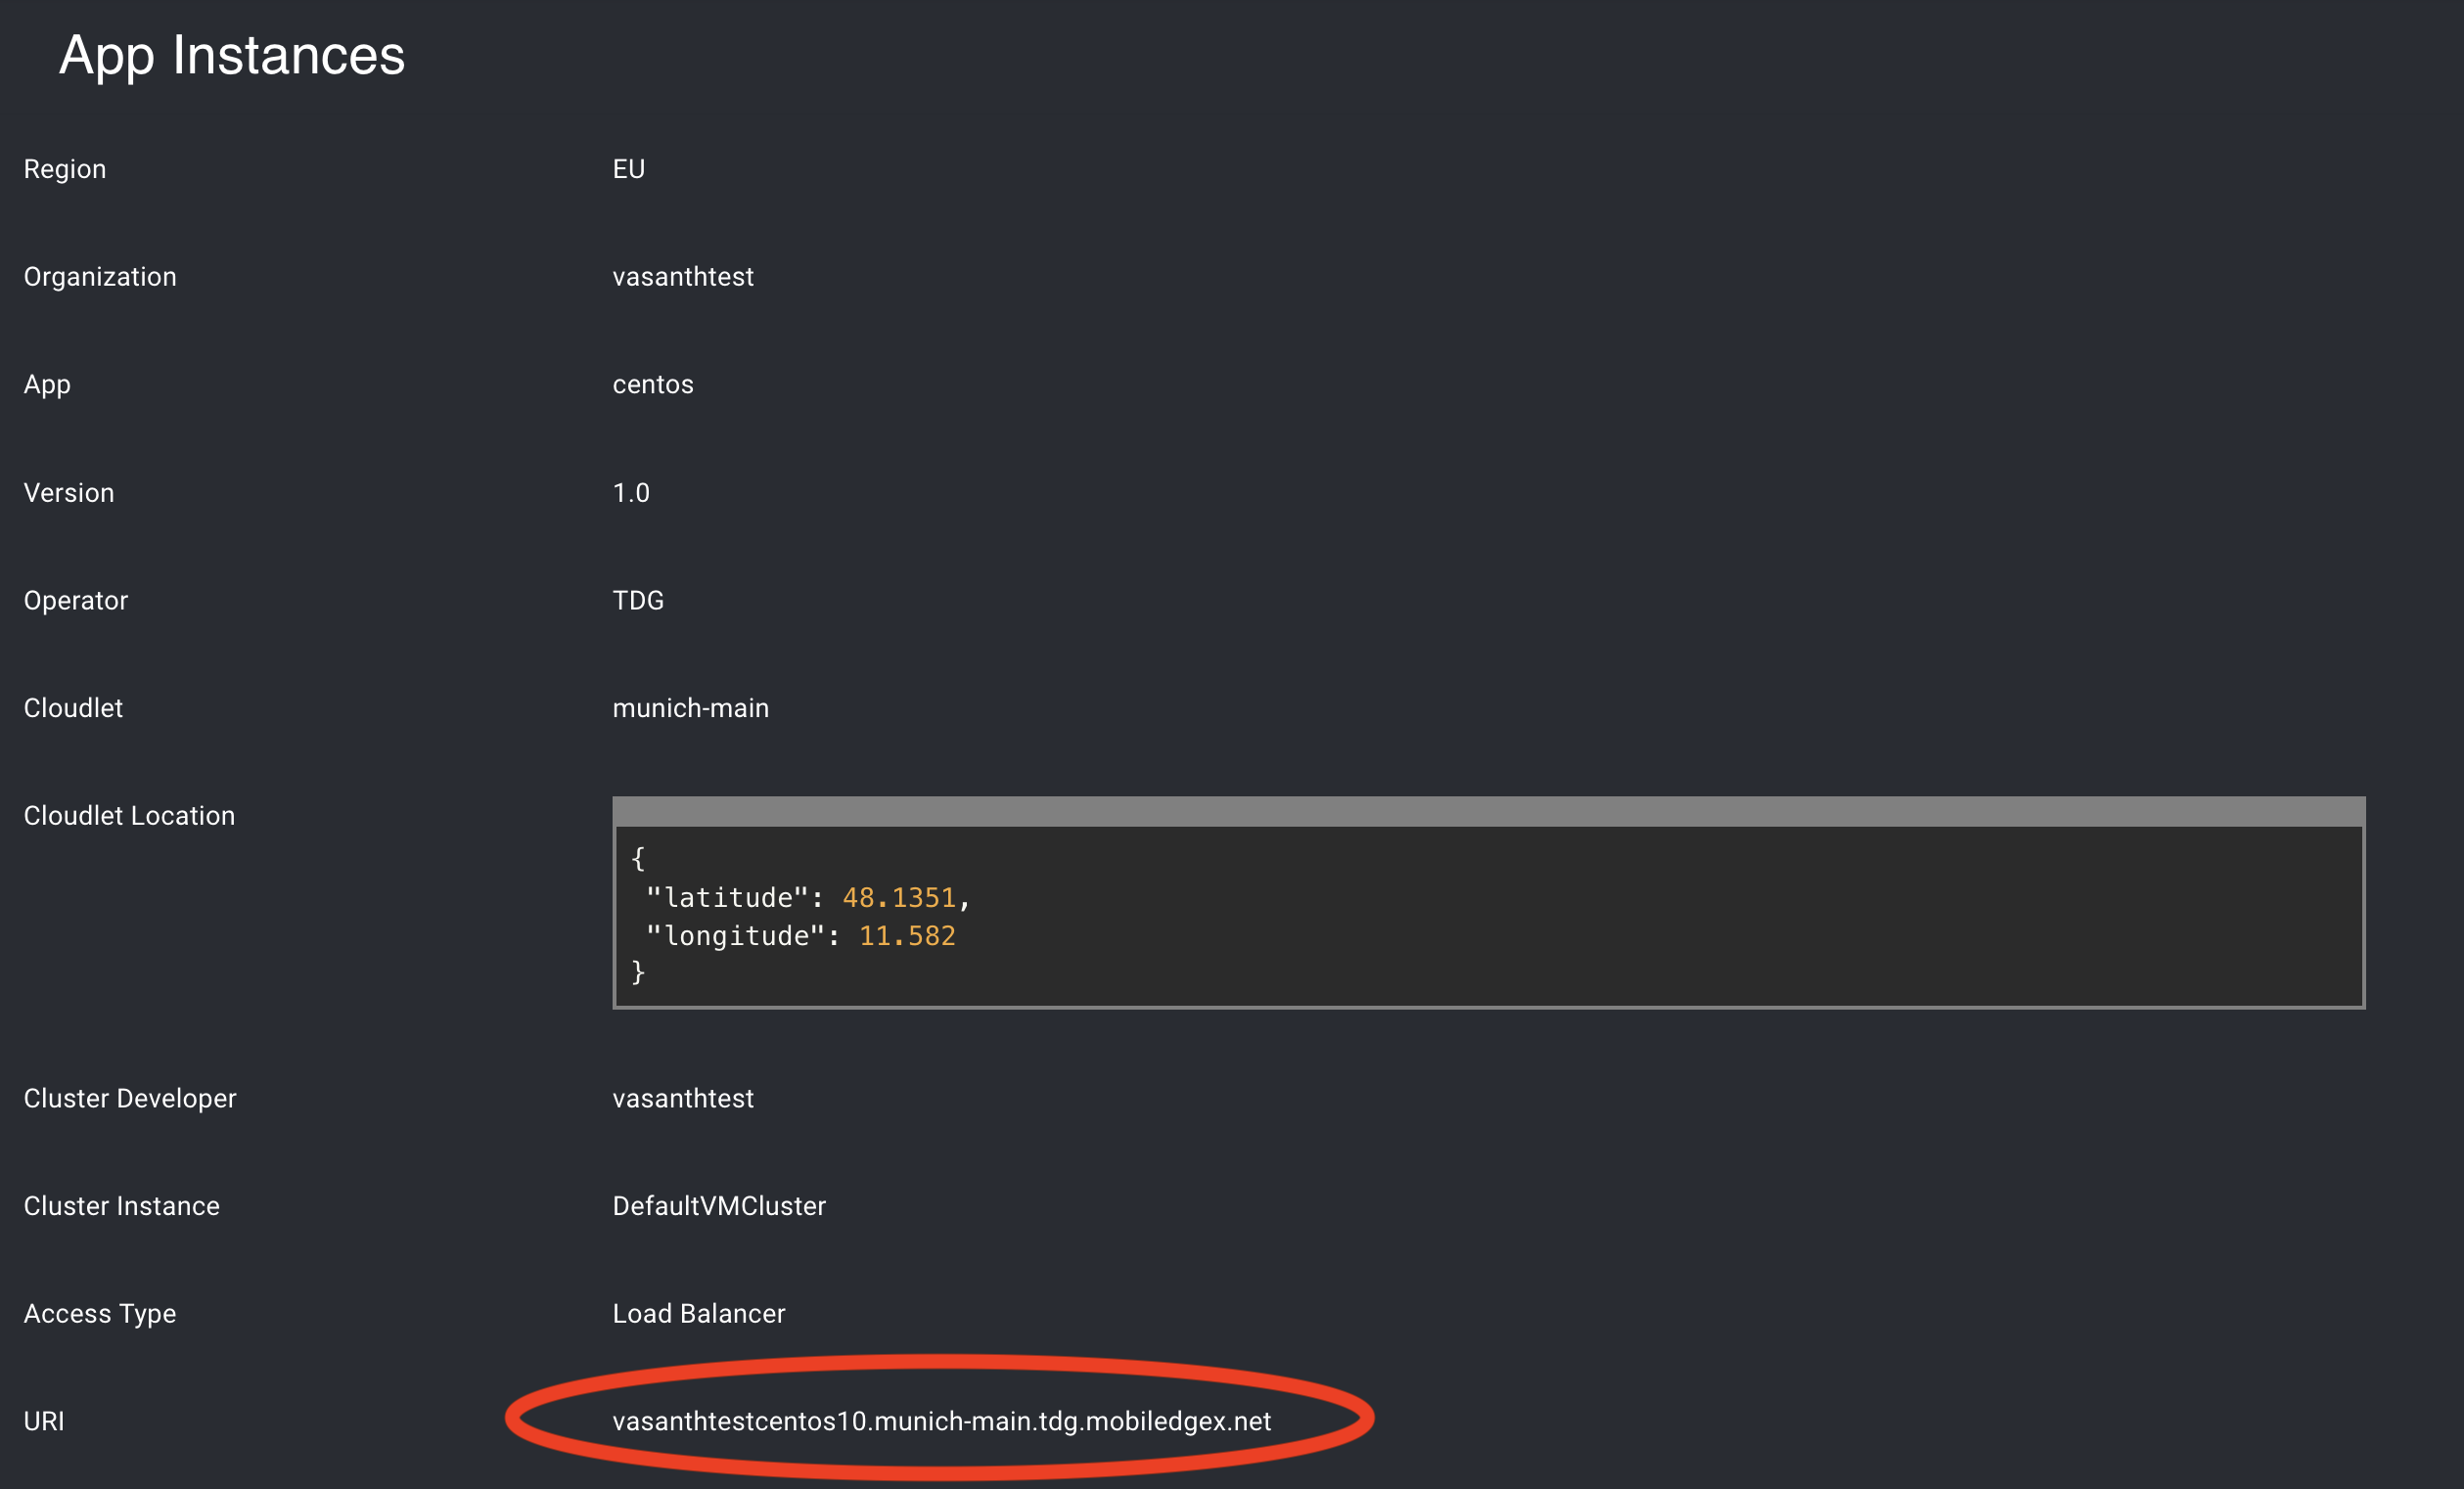
After the VM has been successfully provisioned, select Application Instance in order to view the Application Instance Details page. This page will contain all the information specific to your Virtual Machine Deployment, including the external IP address to connect to the instance.

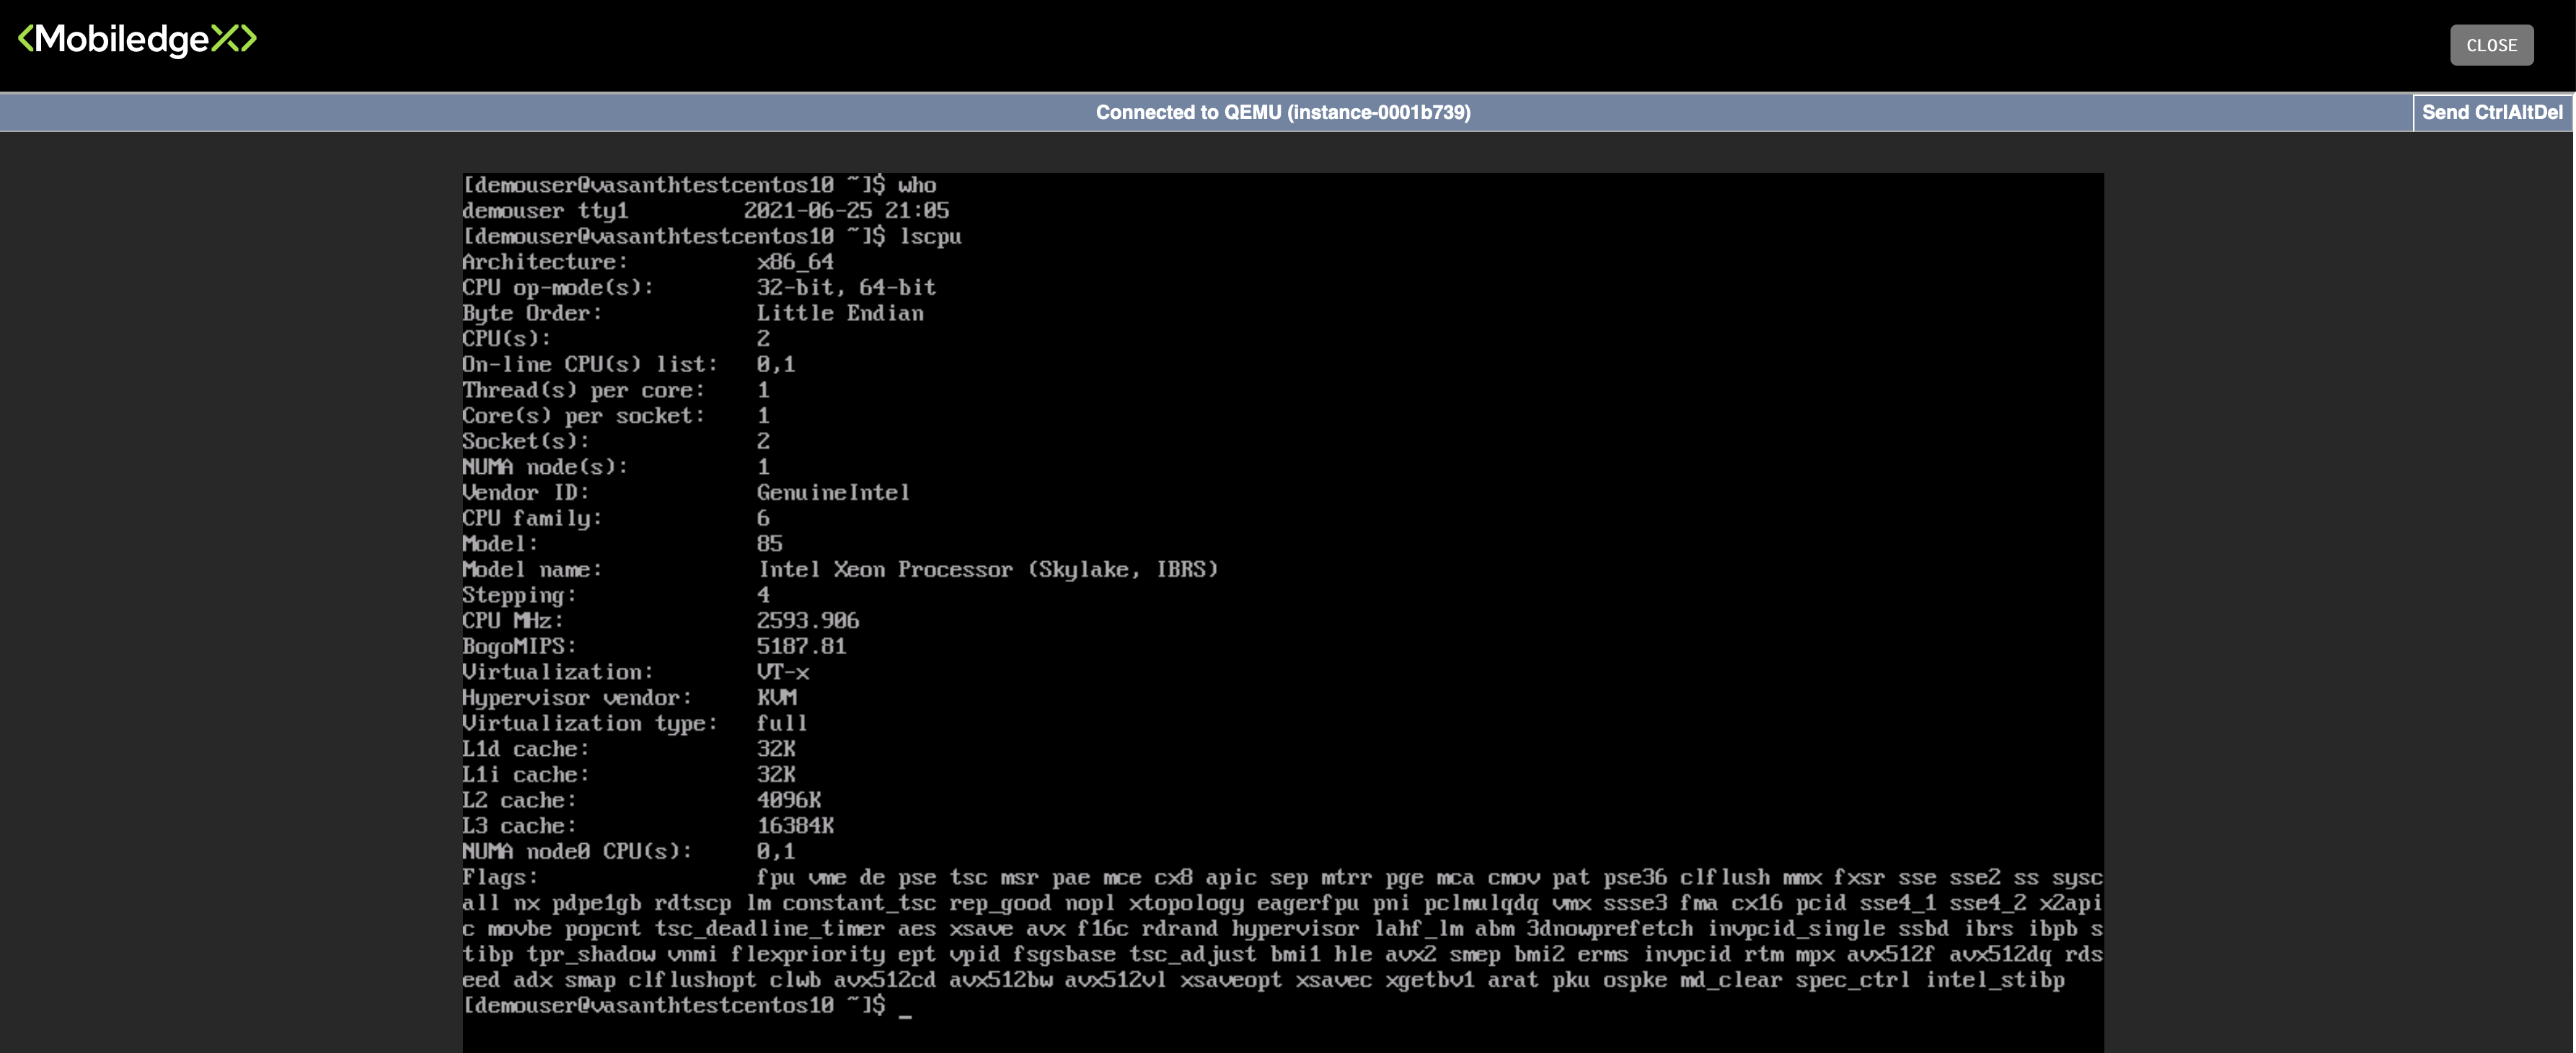
To test that your VM was deployed correctly, navigate to the App Instance page and under the quick access menu, select Terminal. For the CentOS, you should be able to login with the credentials specified in the Deployment Manifest i.e. demouser, changemeplz.

To SSH into your instance with the updated port, you may use the following command:
ssh -p 2222 <app-inst-uri>