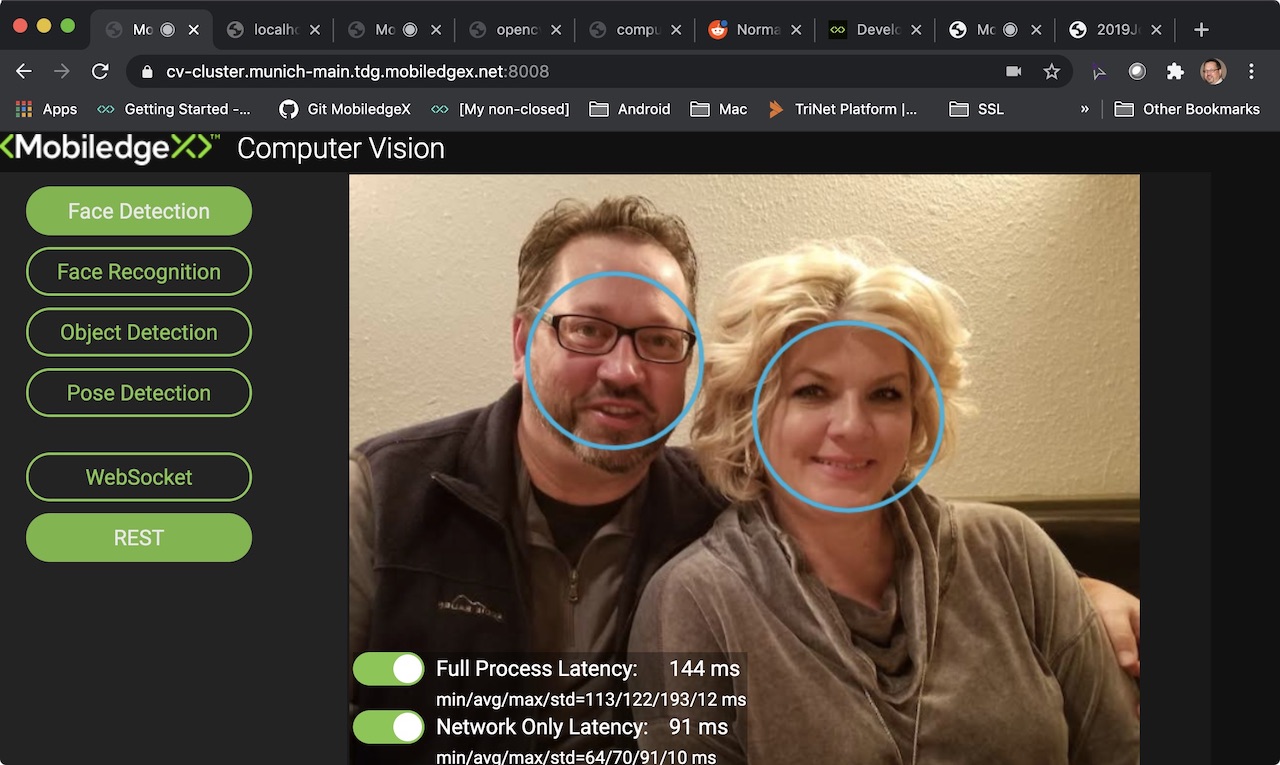
Deploying the Computer Vision Service to the EdgeXR Platform
Last Modified: 02/04/22
The EdgeXR Computer Vision service is an open source application written in Python that is capable of running different types of CV use cases such Face Detection, Face Recognition, Object Detection, and Pose Detection. In this tutorial, we will show you how to:
Build a Docker image of Computer Vision and push the image to the EdgeXR container registry
Create a Application Definition for the Computer Vision Docker Image
Deploy the newly created Application to a specific cloudlet on the EdgeXR platform
Manage and monitor your new Application
Prerequisites
Create a EdgeXR account
Create a Github account
Install Docker Desktop
Clone the EdgeXR Samples repository
git clone --recurse-submodules https://github.com/mobiledgex/edge-cloud-sampleapps.git
Once all the prerequisites are met, follow these steps to deploy an application to the EdgeXR platform.
Step 1: Create a Developer Organization and Add Users
Once you create your EdgeXR account, create a Developer Organization.
Log on to the Edge-Cloud Console. The Organizations page opens.
Select Create Organization to Run Apps on Operator Edge (Developers). The Create Organization screen opens.
Populate all the required fields. Required fields are indicated by asterisks.
Select Create.
Populate all the required fields, and review your organization to make sure you entered the information correctly.
From the Organizations page, and under Actions, select Manage on your newly created organization. Submenus appear on the left navigation of the Edge-Cloud Console.
Step 2: Modify the Makefile for the ComputerVisionServer sample app
Once the sampleapps are cloned from the EdgeXR Github repository, the Makefile associated with the ComputerVisionServer sample app used for this tutorial must be modified. Once the Makefile is modified, we will push the file to the EdgeXR registry. Modifying the Makefile prepares it as an image to upload to the registry.
Navigate to the ComputerVisionServer directory:
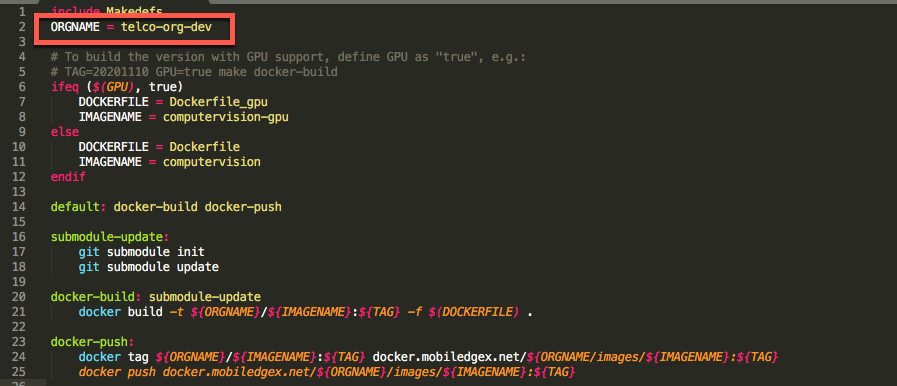
path to cloned repo/edge-cloud-sampleapps/ComputerVisionServer.Make a single line edit at the top of the
Makefilewhere you will change theORGNAMEvalue to the name of the organization you created using the Console. Note that theMakefileis case-sensitive, and therefore, ensure the name of your organization is typed in all lower-case. Here's an example:
Save the
Makefile.
Step 3: Upload the ComputerVision Sample App to the EdgeXR Registry
When you create an organization, both Docker and VM registries are generated automatically for you. You will upload an image of your application to its respective registry.
Login to your Docker registry using the same login credentials as your Edge-Cloud Console login. At the shell prompt, type the following commands:
docker login docker.cloud.edgexr.org
Username: <type in your username>
Password: <type in your password>
You will see a Login Succeeded message. If you do not see this message, you may have typed in the wrong username and password. Go back and try again.
From the terminal, navigate to the
edge-cloud-sampleapps/ComputerVisionServerdirectory.From that directory, run the
makecommand. This builds, tags, and pushes the imagecomputervision:latestto thedocker.cloud.edgexr.org/<your organization>repository. Please allow a few minutes for the fulfillment of the pushed image. Once the image is pushed to the registry, you may use the Docker Desktop to view your image on the EdgeXR repository.Return to the Edge-Cloud Console.
Step 4: Create an Application Definition
After successfully uploading your application image to the EdgeXR Docker registry, specify the application definition. This creates an 'inventory' of applications within the Apps page.
From the Organization page, select Manage on your newly created organization.
Select Apps from the left navigation. The Apps page opens.
Select the plus sign icon to create a new App Definition. The Settings page opens.
Populate all required fields.
Enter ComputerVision as the name of the Application.
Specify the App Version as latest.
Select Docker from the drop-down list for Deployment Type.
Specify the image path as
docker.cloud.edgexr.org/organization_name/images/computervision:latest, whereorganization_nameis the name of the organization you created.Select m4.medium as the Flavor of the compute instance that this application will be running.
Use 2 TCP ports: 8008 and 8011. For 8008, also enable the TLS option.
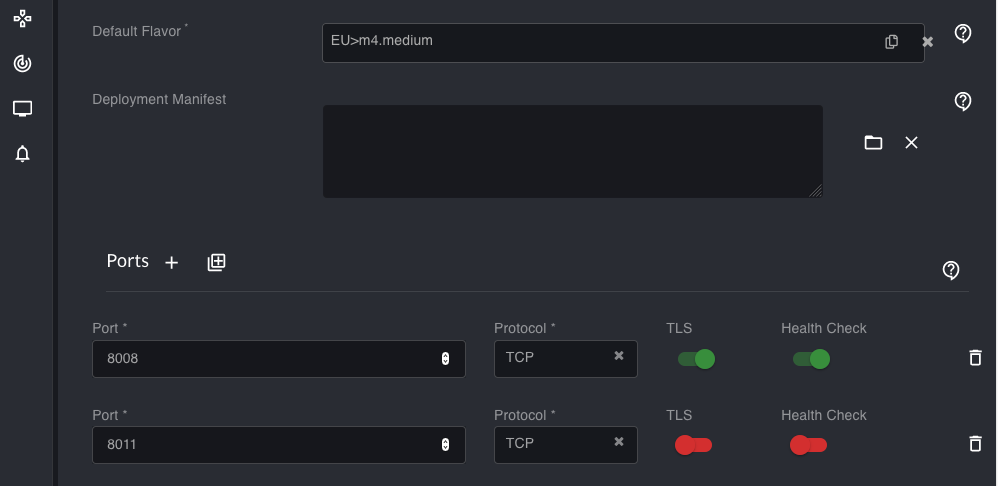
Select Create. The application appears on the Apps page. You can select the application to view details.
Step 5: Create a Cluster Instance (Optional)
After successfully creating an application, you may create a cluster instance, however, this is an optional step. The cluster instance can also be created automatically during the Create App Instance step by selecting the Auto Cluster instance box.
A cluster instance represents a collection of compute resources on a Cloudlet for deploying your application instance, or containers. For example, you can select a Kubernetes cluster to deploy your pods, or select Docker to deploy your docker containers. Note that some of the required fields should be identical to the information entered for the Application Definition, where applicable.
From the left navigation, select Cluster Instance.
Select the plus sign icon to create a new Cluster Instance.
Select your Region from the dropdown menu.
For Cluster Name, type in a name for your cluster.
For Organization, verify the correct organization name is listed.
For Operator, select the Operator network you wish to deploy the cluster.
Select the Cloudlet in which the cluster resides.
For Deployment Type, select Docker from the drop-down list.
Select the IP Access type from the drop-down list.
For Flavor, select m4.medium.
Select Create. You can view the provisioning status of your cluster by selecting the Progress icon.
Step 6: Provision your Application
You are now ready to deploy your application onto a cloudlet and create an Application Instance. This step is called Application Provisioning.
Select Apps from the left navigation.
Under Actions, select Create Instance the quick view menu.
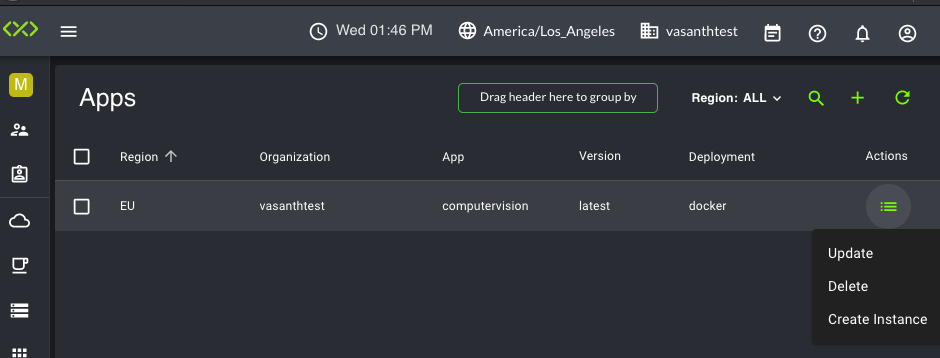
The Create App Instance page opens. Select an Operator and Cloudlet from the available lists to deploy your application.
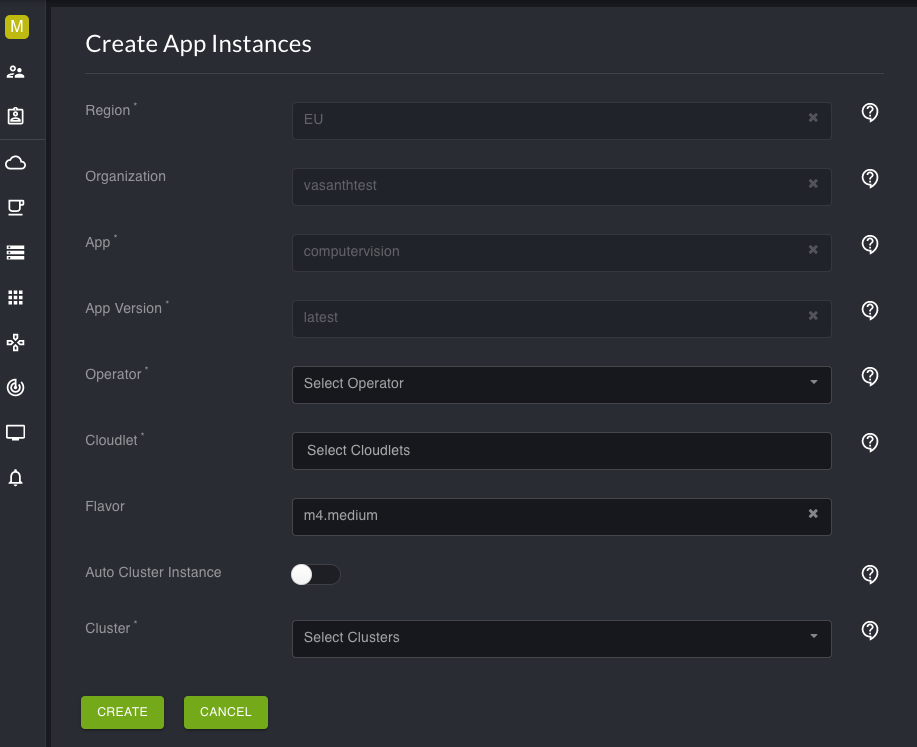
Select the cluster instance created in Step 5 from the drop-down list, or enable Auto Cluster Instance.
Select Create. You can view the progress via the Progress bar. It can take up to a few minutes to deploy your application to the specified cloudlet.
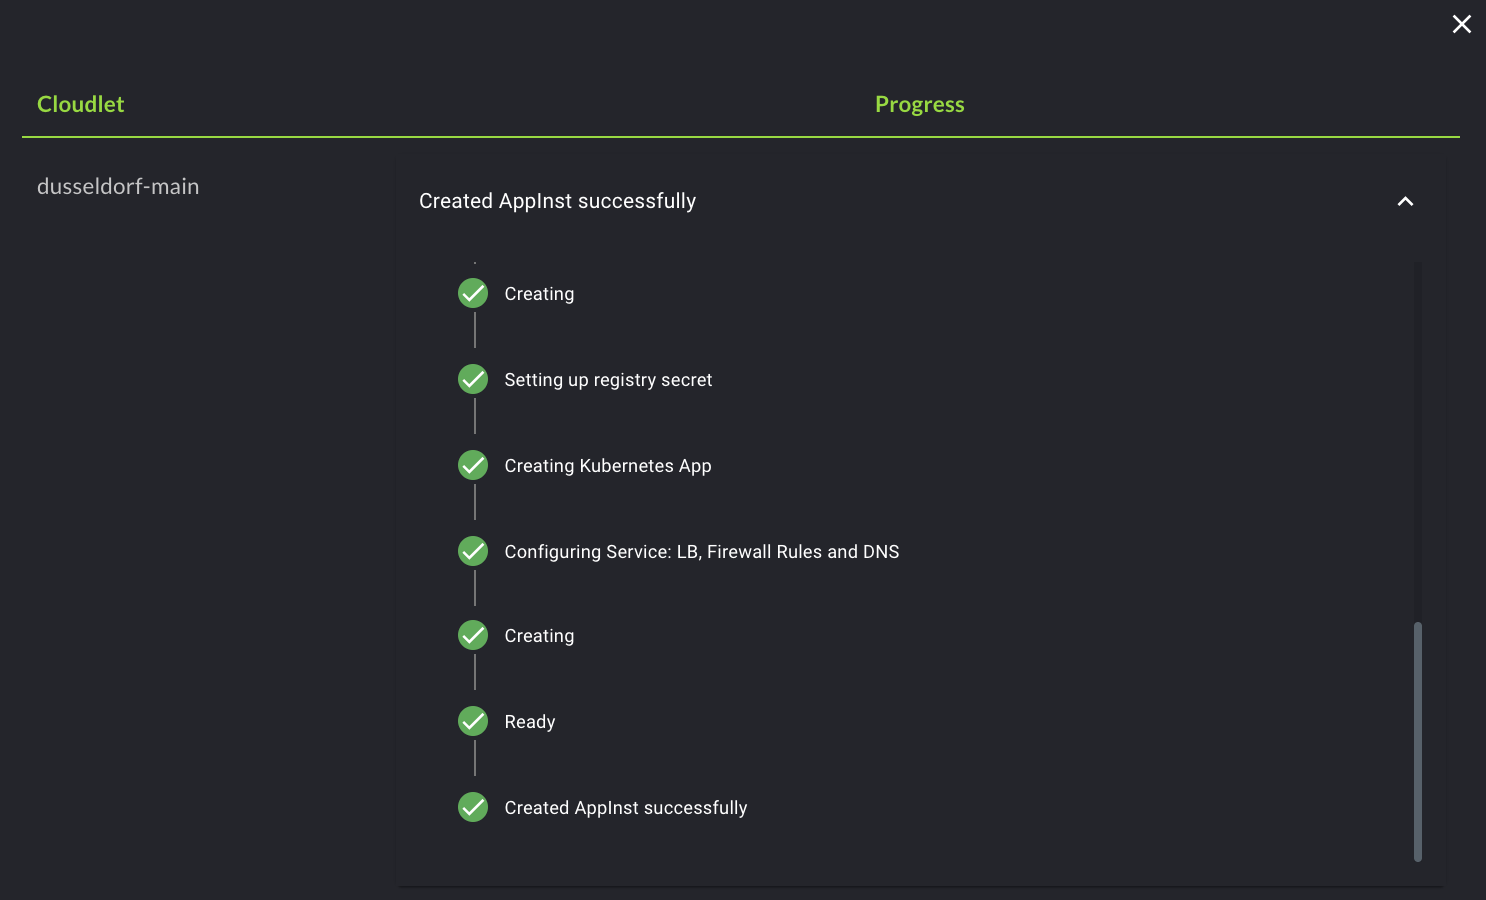
After you've successfully deployed your application, information about your deployed application appears on the App Instances page.
Step 7: Monitor and View Audit Logs
You can view and monitor historical activities made by you, or others, within your organization. Select Monitoring from the left navigation to view historical activities through a single pane of glass. For more information on monitoring and audit logs, see the Edge-Cloud Console Monitoring Guide.
Step 8: Verify App via Web Browser
Normally your client app would find your deployed App Instance by using the FindCloudlet API call with our SDKs. However, the ComputerVision app provides a built-in client that you can test immediately. Select the App Instance you just deployed and look at the URI value:
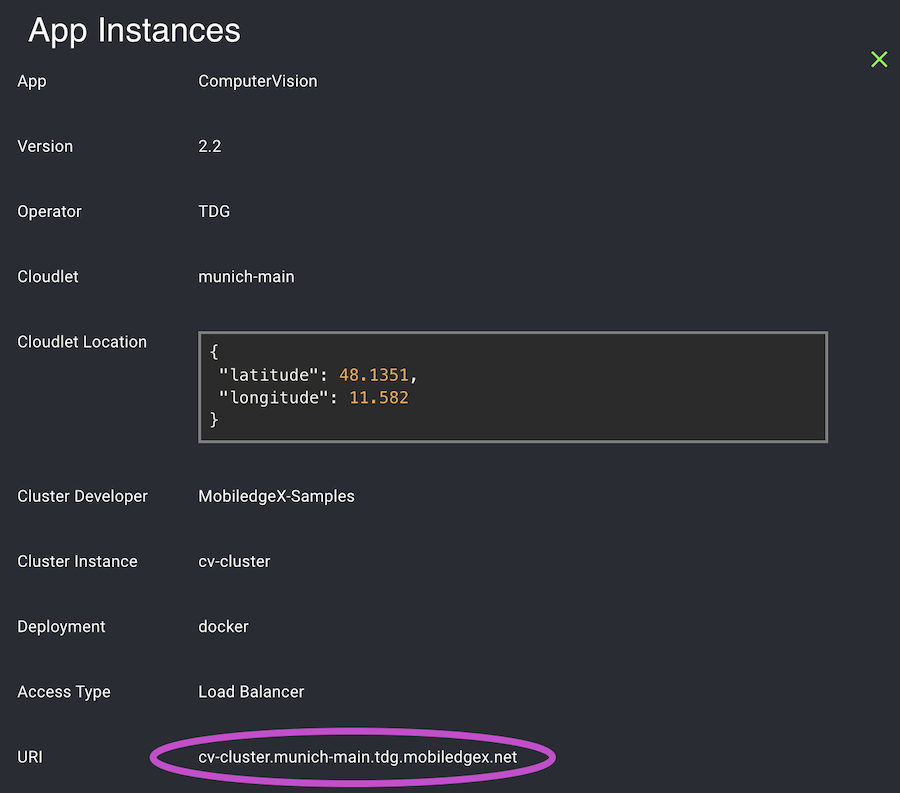
You can copy this and paste it into your web browser address bar to create the URL you need in the form "https://URI:8008". For the example shown, the full URL would be "https://cv-cluster.munich-main-tdg.eu.app.tdg.edgexr.org:8008". After entering this URL, you should see a EdgeXR Face Detection app running in your web browser.
